Thursday, December 30, 2010

Toffee Gooey Butter Cake


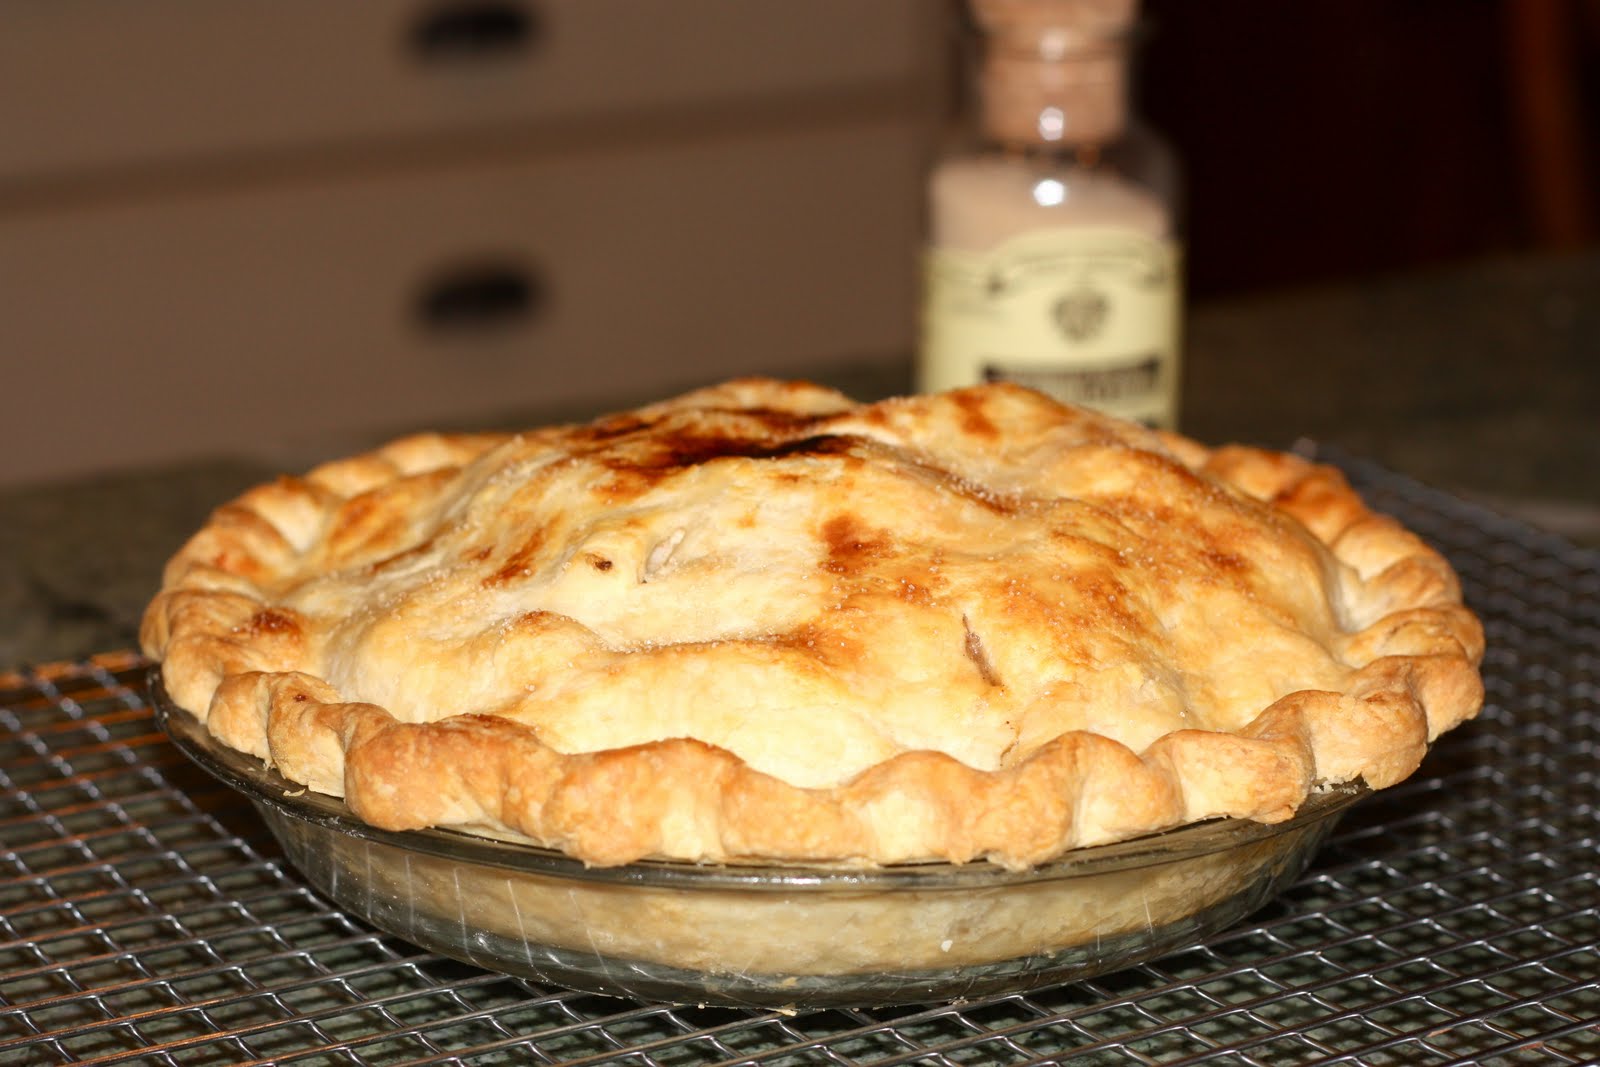
Wow-I have so much to post about! So many yummy and fun recipes I want to share, however, I think this recipe takes first priority. So I'm deciding to do something drastic-very drastic for me. I am going off sugar for the whole month of January! Yes, I know, crazy for me, right? Is that snickering I hear from those of you who think I wont make it one day?! Well, I will prove you wrong! Yes it will be hard, I may have the shakes for a few days but I have been eating way too much the past month I think it's going to feel good to cleanse a bit. So since in just a few short days sugar wont be an option, I decided to go out in a really big way, one last hurrah. Everyone, meet the Toffee Gooey Butter Cake.

I mean, the name says it all. It's got toffee, it's ooey and gooey and it's definitely got butter! This is such a yummy, finger licking good dessert, and so so easy! It's one of those desserts where you don't have to think about. It's a sinch to throw together and you know everyone will love it. No it's not as gourmet as some desserts, but I appreciate all desserts, the gourmet that takes hours maybe days to throw together, and the simple which consist of lots of sugar and butter and you just can't go wrong. It's one of those desserts where when you eat it with a group of people you may find yourself saying "My, isn't this rich!" but you are THINKING "I could quite possibly eat this whole pan by myself! Today was snowy, the roads were bad and I was stuck inside with this dessert all day. I should be in trouble for how much of this dessert I ate! But who cares, in a few days it will be a big no no so I am off to eat some more gooey butter cake, here's the recipe, and if you are planning to go on a new years diet, try this baby out for one last hurrah!


TOFFE GOOEY BUTTER CAKE
by Paula Deen
Ingredients

Cake:
Vegetable oil cooking spray
1 (18.2- ounce) package yellow cake mix
1 large egg
1/2 cup (1 stick) butter, melted

Filling:
1 (8-ounce) package cream cheese, softened
2 large eggs
1 teaspoon vanilla extract
1 (1 pound) box confectioners’ sugar
1/2 cup (1 stick) butter, melted
1 cup toffee bits
Directions

Preheat the oven to 350 degrees F. Spray a 13 by 9 by 2-inch baking pan with vegetable oil cooking spray.

In the bowl of an electric mixer at medium speed, combine the cake mix, egg, and butter and mix well. Pat evenly into the bottom of the prepared baking pan and set aside.

In a bowl, mix together the cream cheese, eggs, vanilla extract, confectioners’ sugar and butter. Beat on medium speed until smooth. Fold in the toffee bits with a spatula.

Pour the filling over the cake mixture and spread it evenly. Bake until the center is just a little bit gooey, about 40 to 50 minutes. Remove from the oven and allow to cool completely. Cut into pieces and serve.

Thursday, December 16, 2010

One of My New Favorite Things...


So I've been on a little baking hiatus, I think it's having a 7 month old who still isn't sleeping through the night, so it makes things like baking sound exhausting and impossible. But finally the other day I baked! I made two things, one was a failure and one was a giant success! The failure, well, I will make it again and post when it's a success so let's not even go there. But my success, well let's talk about it:)

My past few posts have been of sugar cookies. I've been tying out a few different recipes trying to get just the right one. However, all of them have been good in their own delicious and different way. I found a recipe for cream cheese sugar cookies which had 8 oz of cream cheese in the batter-in the words of Ina, "How bad can that be?!" Well it wasn't bad at all, in fact, it was absolutely delicious, so delicious that I think it will be my new go to recipe. The recipe calls for baking powder but the cookies still held their shape pretty well. Now here's a few twists I added to the recipe...

The recipe calls for a teaspoon of almond extract. I've had for a while a bakery emulsion called "Princess Cake and Cookie". It adds a light citrus, buttery, nutty taste. It's delicious. So I added a teaspoon of that instead of the almond and I made a cream cheese frosting. I will add the frosting recipe below-it turned out really good! I made these for a get together with the girls on my mom's side, I had a cousin tell me they were the best sugar cookies she's had. They are pretty dang good. They would be great cookies to leave out for Santa or to take to a cookie swap!


Cream Cheese Cookie Cut-outs
from Karen's Cookies
  • 1 cup butter
  • 1 8-oz package cream cheese
  • 1 ½ cups granulated sugar
  • 1 egg
  • 1 tsp. vanilla extract
  • ½ tsp. almond extract
  • 3 ½ cups flour
  • 1 tsp. baking powder
Beat butter and cream cheese until well combined. Add sugar; beat until fluffy. Add egg, vanilla and almond extract; beat well. In a small bowl, combine flour and baking powder. Add dry ingredients to cream cheese mixture; beat until well mixed. Divide dough in half. Wrap each half in plastic wrap and refrigerate several hours.

Preheat oven to 375°. Roll dough to ¼ inch thickness. Into desired shapes and place on parchment lined cookie sheets. Bake 8-10 minutes, or until edges are lightly browned. (very large cookies may take longer to bake)

Cream Cheese Frosting

1 stick of butter, softened
8 oz cream cheese
4-5 cups of powdered sugar
pinch of salt
vanilla bean paste
couple tablespoons heavy cream

Blend cream cheese, salt, and butter until creamy. Add powdered sugar to desired consitency. Add vanilla bean paste (or just vanilla). After everything is all creamy and yummy add a little bit of heavy cream. Don't whip it, just mix it in on low speed until mixed in well.

Friday, December 3, 2010

A Yummy, Easy Dinner


Hey everyone, hope you had a wonderful Thanksgiving! Mine was really nice, a fun day with fabulous food surrounded by wonderful family. I will share pics later, but first, here is a very quick dinner recipe!


Life has been pretty busy, I have some news to share, I will probably post about it within the next week. A couple weeks ago my house was full of a couple of sickies. Micah got really sick with the stomach flu and Eleni got her first cold. It wasn't fun. One night I decided to go over to my moms and have dinner over there with them to get me and Eleni out of the house and so Micah could rest. My mom and I that day had watched "Ten Dollar Dinners" with Melissa d'Arabian. I have to say, I have never really watched her show, but the meal she was making this day really intrigued me. She made Crispy-Skinned Chicken a l'Orange. It seemed so easy and so yummy, so my mom and I decided to make it! My mom watched Eleni while I made the chicken, it was such a nice break! The chicken turned out great, very flavorful and moist, and so quick and easy. This is a great, inexpensive meal, and you probably will have most, if not all of the ingredients already in your fridge/freezer!

So now I am going to have to give some more of Melissa's recipe's a chance, because this one was a winner! Go here for the recipe

Wednesday, November 24, 2010

Until We Meet Again


Yesterday afternoon my husbands family suffered a great loss. His aunt Deanne had passed away from breast cancer, after battling and fighting against the horrible disease for over 7 years, when they only gave her 6 months to live upon diagnosis. My heart goes out to my husbands family and to anyone who was privileged to know such an amazing woman. I loved her so much.

I married into my husband's family 4 1/2 years ago. And during that time I was so very blessed to get to know Deanne and to learn of what an amazing woman she was. She was the most darling mother. She has 3 daughters who are all mothers themselves, they are the sweetest mothers and that is truly a testament to the type of loving mother Deanne was. She was so full of life. You would never know she was battling a horrible disease or in pain. She never complained and never worried about small or petty things. I am so grateful for her example of living life to the fullest, and not letting anything hold you back from experiencing life and being happy.

I am going to miss her big hug and kiss on the cheek she would give me as I left our family dinners. I am going to miss her pulling out her African Beads and having all of us girls dive right in and make beautiful jewelry with them. I am going to miss her getting excited over the desserts I would make. I am going to miss her beautiful smile and contagious love and positivity she brought to every room she entered. She has taught me to be more relaxed with life, and not worry about the little things, but live life to the fullest. I am so grateful I married into such an amazing family full of amazing people. Deanne was truly amazing. It will be hard to imagine this life on earth without her.

It's hard to get through such a loss, my heart especially goes out to the Krieger family at this difficult time. During this time of Thanksgiving, I am truly reminded of the many precious things I am grateful for. I am so grateful for family. I am grateful for my belief that family's will be together forever, and that I know Deanne's family will all be together again one day, and I will get to see her again. I am grateful for the gospel I believe in, it is the one constant in my life that makes it possible for me to get through hard things. Many have something in their life that helps lead and guide them, it is my belief in this gospel that gives me guidance and strength, especially during such an impossible time. This message brings me comfort. And I believe this message with all of my heart. Love you Deane, will miss you so much. Thanks for all you've taught me without even knowing it.

Thursday, November 18, 2010

Sausage Cauliflower Spaghetti...er...penne :)


Hey everyone! Well I am back from our six day trip. We first made a stop in Dallas for a few days and then finished off in Chicago. I will share details about why we went on the trip later, but first, let's get cookin!

Some of you may know that I am also apart of another blog, "and it's good for you too". This blog was created by me and some of the women on my mom's side of the family. I come from a family who loves to cook, but we also try to give our families good healthy meals. This blog was a way for us to motivate each other to cook healthy, as well as providing an array of healthy recipes for us all to try. My cousin Melissa posted about this sausage cauliflower spaghetti and I tried it right away!

It was such a yummy, easy, simple, and healthy dish! I used whole wheat penne instead of spaghetti because that's what I had. It felt so good to have a healthy, homemade meal after eating out for nearly a week. I'm excited to get back in the swing of things and start cooking healthy meals..of course I have a cream cheese sugar cookie I have on my list to try soon as well:)

Sausage Cauliflower Spaghetti

Kosher salt

12 ounces whole wheat spaghetti

3 tablespoons extra-virgin olive oil, plus more for drizzling

12 ounces sweet Italian turkey sausage, casings removed

6 cloves garlic, sliced

1 small head cauliflower, broken into small florets

1 bunch scallions, chopped

1 cup grated parmesan cheese

Bring a large pot of salted water to a boil. Add the spaghetti and cook as the label directs. Reserve 2 cups cooking water, then drain.

Meanwhile, heat the olive oil in a large skillet over medium-high heat. Crumble the sausage into the skillet and cook, breaking it up with a wooden spoon, until lightly browned and no longer pink, 4 to 5 minutes. Clear a space in the pan, add the garlic and cook until just golden, 2 to 3 minutes. Add the cauliflower and cook until the edges are browned, about 2 minutes. Add 1 cup of the reserved cooking water, cover and reduce the heat to medium. Cook until the cauliflower is tender, about 8 more minutes. Uncover and boil over high heat until the liquid is almost evaporated, about 2 more minutes.

Add the spaghetti to the skillet along with the scallions. Drizzle with olive oil and season with salt. Toss for a minute or two to wilt the scallions and coat the pasta with the sauce, adding up to 1 cup cooking water, if needed, to loosen. Remove from the heat, sprinkle with the cheese and toss. Divide among shallow bowls and drizzle with more olive oil, if desired.

Tuesday, October 26, 2010

Delicous Apple Pie...So I Hear...


Ok, this is embarrassing. I am posting about this delicious apple pie...and guess what...(do I dare even say it???) Well...I don't even like apple pie! Gasp! Yes, yes, I know, I am an avid baker and cook and I don't like apple pie. To be honest, I don't really like any fruit that's been cooked in a dessert, except maybe berries. But no peach cobbler or apple pie for me. It's unfortunate, I know, I really wish I liked it, on the other hand, I pretty much like every dessert out there which presents a problem when I want to try to keep my girlish figure. So when there is a dessert I can easily pass up, I'll take it! However, what I DO like to do with apple pie is this: scoop up some of the cinnaminy apple pie juice, pour it over vanilla ice cream, then sneak a corner of the crust and crumble it over the top. My mom chastised me for stealing some of the crust, but I couldn't help it! Super weird I know, but that's how I like my apple pie..or my un-apple pie....anyways, here's the recipe for all of you apple pie lovers out there! I know you will like it! Would also make a great additions to your Thanksgiving feast:)

My mom makes hands down the best pie crust I've ever had, and I love
watching her make it! There's something about her hands working with the dough.
I've always loved my mom's hands, I feel they tell a story. They are hard working hands
that took care of her family by cooking yummy foods and rocking her babies to sleep.
I love them. May sound cheesy, but it's how I feel :)

(That's right, smile and stir those apples! Smile like your going to
love the pie when it's done, but in reality your only going to steal
it's lovely pie juices and crust and put them over ice cream!)


Finished off with a nice sprinkling of vanilla sugar

And the finished, beautiful product. I have to say even though I don't like
apple pie, I always think it looks beautiful.

I hope you all have a wonderful and happy Thanksgiving!
Go here for the apple pie recipe

Trick or Treat?! Is that really even a question!?


I mean seriously, during Halloween, when treats are flowing abundantly I think the "Trick" part of that phrase is meaningless:) And have I got a "Treat" for you! After making these sugar cookies for last month's Daring Baker's Challenge, I've been in the mood to make some more sugar cookies, but wanted to try a different recipe. I stumbled across the site Karen's Cookies, it's a great site to look at if you want to see cookie decorating tutorials and is also a great site for different cookie recipes. I decided to try her Basic Rolled Sugar Cookies, the recipe had butter, sugar, almond flavoring, and an extra egg yolk, how could that be bad? It was absolutely delicious. The only thing is, it's not the BEST recipe that holds the shape of the cookie cutter. This recipe is much better for that. But it's still ok, it holds the shape pretty good but not perfectly. These cookies will turn out to be a softer sugar cookie, which I like.

Now for the frosting. I love the look of cookies decorated with royal icing, but I love the taste of buttercream. I found on Karen's Cookies a recipe for Meringue Powder Buttercream, it's supposed to harden on the top of the cookie so you can still stack them if needed, but have less of a crunch than royal icing. Here's my review of this buttecream: I felt it didn't harden much more than a regular buttercream, but it tasted great. I'm kind of torn as to whether or not I will make it again, I don't see the point with going to the trouble making it when I could just make a simple buttercream. But we will see-maybe I will make it again and like it better the second time around.

Now as for the look of these cookies-don't judge me:) I only had peach food coloring as opposed to a bright vibrant orange, so these cookies weren't' the most appealing Ive ever made, but they certainty tasted great. And with a fussy almost 6 month old begging for my attention, I did the best I could at making them cute :) So if you are going to a fun Halloween Party this week these would be great cookies to take!


Basic Rolled Sugar Cookies
  • 1 cup butter, softened
  • 1 cup superfine sugar, or granulated sugar, processed in blender or food processor for 30 seconds
  • ½ tsp. Salt
  • 1 large egg
  • 1 large egg yolk
  • 2 tsp. Vanilla extract
  • ½ tsp. Almond extract or emulsion, optional (I added 3/4 tsp. almond emulsion)
  • 2 ½ cups all-purpose flour.
Cream butter, sugar and salt until light and fluffy, about 3 minutes with mixer set at medium speed . Add yolk, beat well. Add whole egg, vanilla and optional almond extract and beat until well-incorporated. Add flour; beat at low speed just until flour is mixed in; do not overmix. Divide dough in halves or thirds and wrap in plastic wrap. Refrigerate until firm, at least one hour and up to 2 days.

Preheat oven to 375 degrees. Dust work surface and rolling pin with flour. Roll dough to 1/4" thick, sprinkling with additional flour as needed to prevent sticking. Cut into desired shapes and place on parchment or silicone-lined pans. Bake in preheated oven until cookies appear dry on the surface and are light golden brown on the edges, about 10 minutes (very large cookies may take up to 12 or 13 minutes). Remove from cookie sheets to cooling racks and cool completely before decorating.

Meringue Powder Buttercream
  • 1/3 cup water
  • 3 T. meringue powder
  • ½ cup shortening (I used butter, I am a firm believe the shortening should never be used in a frosting!)
  • 4 ½ cups powdered sugar (1 lb. 3 oz. If you have a scale)
  • 1 tsp. vanilla extract (use clear vanilla if you want a pure white icing)
  • ¼ tsp. almond extract
Place half of the powdered sugar and the meringue powder in the bowl of an electric mixer. Whisk together well. Turn on mixer (use whip attachment) and, while motor is running, slowly stream in the water. Mix until everything is incorporated. Turn mixer to high speed and whip until stiff peaks form. Add flavorings and mix well. Change to paddle attachment (for stand mixer) or dough hook (for Bosch). If using a hand mixer, use the same beaters you were using before. Add remaining powdered sugar and shortening and whip for 2-3 minutes more.

Note: Don't skimp on the whipping time after adding the shortening. You really need to whip it well to prevent separation later.


Monday, October 18, 2010

National Chocolate Cupcake Day!!!!

(cupcakes I made for my grandma in laws 80th birthday)

Did you know that today is national chocolate cupcake day?! So run out and grab a chocolate cupcake to celebrate! :) I think I am going to run over to the new cupcake chic and get one. Have a wonderful day!! :) :)

Thursday, October 14, 2010

Bakerella :)

Today Bakerella came to a Williams Sonoma in Salt Lake City to do a book signing for her new book "Cake Pops"!!! My three darling cousins and I went, it was such a blast. Of course, the line to see her was CRAZY! She truly is so talented. She was so sweet and darling. She definitely is THE celebrity within the blogging world. I'm still in awe that I was able to meet her and she personally signed MY copy of "Cake Pops"!! I can't wait to try some of those cute pops out. Here are some pics of the fun day :)


Us with Bakerella:) So much fun!

Eleni sported a cake shirt in her honor

Yay! Me with my signed copy-now it's time to start making
cupcake pops!!!

Wednesday, October 13, 2010

Pumpkin Dessert Squares


So this is not a new recipe to this blog, but one that needed to definitely be updated with better pictures. The pictures I used to have for it just didn't make this dessert look as amazing as it really was. Seriously-this could be my favorite pumpkin dessert I make during the fall. I was at my local Williams Sonoma store the other day and they were passing out samples of it which reminded me that it was time to start making it again! I've been trying to eat pretty healthy, and I've been surprisingly been doing a good job! ...that is until I made these bad boys. With this dessert I can't just stop at one square, I will keep piecing and piecing at it until all of a sudden a whole row is gone!! O00pps :)

The only downfall to this recipe is you have to use Williams Sonoma's Pumpkin Pecan Butter, which is almost $10 a jar. However this dessert is so good I think it's worth getting. I want to try to make this dessert with a substitute so it's not as expensive to make. Making I could substitute it with some canned pumpkin mixed with spices?? Who knows, but I will definitely give it a shot so I won't alwasy have to rely on using the Pumpkin Pecan Butter, but for now that's what I'll use:) Hope you have a chance to try this one out :)

Pumpkin Dessert Squares
1 box yellow cake mix
1 jar Pumpkin Pecan Butter (williams sonoma or other kitchen store)
3 eggs
1 TBSP flour
1/4 cup sugar
3/4 cup butter
3 TBSP Milk
1 tsp cinnamon

Reserve 1 cup of the cake mix and set aside.
Mix remaining cake mix with 1/2 cup of melted butter and 1 egg. Press mixture lightly into the bottom of 13 x 9 inch pan.
Mix 1 jar of Pumpkin Pecan Butter with 2 lrg eggs and 3 TBSP milk and pour over cake mixture in pan.
Mix to a crumble reserved cake mix with 1 TBSP of flour, 1/4 cup of sugar, 1/4 cup of soft butter and 1 tsp of cinnamon - crumble over the top of the pumpkin layer.
Bake 35-40 minutes and 350 degrees or until golden.
Cool and serve!

Tuesday, October 5, 2010

Lentil Sausage Soup


Fall is now upon us, and I am so excited to start making yummy soups and stews. Here is the first soup I've made this fall season. I wanted to make something healthy, and yet something different-something I haven't made before. I stumbled a crossed Ina Garten's Lentil Sausage Soup. Yes I know- another Ina Garten recipe, but I am never disappointed with her recipes and I didn't want to risk trying something new and having it turn out bad. I just knew this soup would be amazing-and it was. It's really filling and extremely flavorful. I did change a couple things, I left out the sausage and red wine vinegar. I didn't have the vinegar and even if I did I'm not sure if I would have added it, it was still delicious without it. I know I will be making this soup a few more times this fall and winter. Next on my to do cooking/baking list is to make something pumpkiny-mmmmm can't wait:)


Lentil Sausage Soup

by Ina Garten

Ingredients

nocoupons

  • 1 pound French green lentils (recommended: du Puy)
  • 1/4 cup olive oil, plus extra for serving
  • 4 cups diced yellow onions (3 large)
  • 4 cups chopped leeks, white and light green parts only (2 leeks)
  • 1 tablespoon minced garlic (2 large cloves)
  • 1 tablespoon kosher salt black pepper
  • 1 tablespoon minced fresh thyme leaves
  • 1 teaspoon ground cumin
  • 3 cups medium diced celery (8 stalks)
  • 3 cups medium diced carrots (4 to 6 carrots)
  • 3 quarts Homemade Chicken Stock or canned broth
  • 1/4 cup tomato paste
  • 1 pound kielbasa, cut in 1/2 lengthwise and sliced 1/3-inch thick
  • 2 tablespoons dry red wine or red wine vinegar
  • Freshly grated Parmesan, for serving

Directions

In a large bowl, cover the lentils with boiling water and allow to sit for 15 minutes. Drain.

In a large stockpot over medium heat, heat the olive oil and saute the onions, leeks, garlic, salt, pepper, thyme, and cumin for 20 minutes, or until the vegetables are translucent and tender. Add the celery and carrots and saute for another 10 minutes. Add the chicken stock, tomato paste, and drained lentils, cover, and bring to a boil. Reduce the heat and simmer uncovered for 1 hour, or until the lentils are cooked through and tender. Check the seasonings. Add the kielbasa and red wine and simmer until the kielbasa is hot. Serve drizzled with olive oil and sprinkled with grated Parmesan

Sunday, October 3, 2010

Bachelorette Cupcakes


My sister in law asked me to make some cupcakes for her friend’s bachelorette party. She wanted me to match the colors of the party, which were a turquoise blue and pink. Of course I was so excited to do it, I love any excuse to bake.

I used my all time favorite chocolate cupcake recipe- well my all time favorite for now, I have yet to come across a recipe I like better. The cupcakes always come out just right, very moist and a slightly denser cupcake than most. I used my extra brutte cocoa powder this time in the cupcakes and it made these cupcakes even better. I frosted them with a cream cheese frosting. I never really follow a frosting recipe, but the general rule I follow for a cream cheese frosting is equal amounts of cream cheese and butter, creamed together, then I add just enough powdered sugar so that it taste good but isn’t too sweet. For this frosting I used a half pound of cream cheese and a half pound of butter, and I probably added about 5-6 cups of powdered sugar, I didn’t really count but that is my estimate. I always add good vanilla, like a Madagascar vanilla, it makes a big difference. O-and a pinch of salt,makes a big difference I think.

Since my last 3 posts have been sweet things, how about something savory?? How does a lentil sausage soup sound?? Check back tomorrow for the recipe :)

Wednesday, September 29, 2010

Devil's Food Cake with Chocolate Mousse Buttercreammm...


So are you ready for the best devils food chocolate cake recipe ever?? The most delicious, moist cake piled high with the most unbelievable chocolate mouse buttercream??? You are! Are you sure???...K here it is!!!

My bday was a week ago, and on Sunday I made myself a chocolate cake to celebrate my birthday with my fam (yes, I like to make my own birthday cakes :) ). I've had the wonderful book "Sticky, Chewy, Messy, Gooey" for a while, and I love it! Not only is it so much fun to flip through and look at the delicious pictures, but the recipes I have tried so far taste just as good as they look in the book. I highly recommend this book, it's a winner :)

A reason why this cake is so good is because of the chocolate mousse buttercream. It's so creamy and chocolaty and not overly sweet. But if you decide to make this, do me a favor. When it comes to adding the butter to the mouse, just close your eyes and put it in! Yes, all 1 1/2 pounds of it!!! I mean, it is a cake, no need to try skimping on calories. It will seem like an incredible amount of butter, but trust me, it's worth putting it all in, this buttercream is o- so good:)

I found the recipe online, and you can find it here!

Monday, September 27, 2010

Daring Bakers: Decorated Sugar Cookies

The September 2010 Daring Bakers’ challenge was hosted by Mandy of What the Fruitcake?!Mandy challenged everyone to make Decorated Sugar Cookies based on recipes from Peggy Porschen and The Joy of Baking.


Hello there! I am so excited for this post! One - because it's a post!! And I have been on a little hiatus with my redesigning of my blog 'n all... And two - because it's a Daring Baker's Challenge!! I haven't completed a challenge in a while because it got really hard to while I was pregnant and even harder after I had Eleni. But I was so excited for this challenge I just had to find a way to complete it. I've had Peggy Porschen's book "Pretty Party Cakes" for a while now, and every now and then I flip through it and marvel at the adorable cakes, cookies, and goodies that are in there. I've always wanted to try her sugar cookies and decorate them all cutesy with royal icing but have always been a little intimidated, and after completing them I don't know what for. Each individual step is very simple, however, they do take some time to complete depending on how serious you are about your decorating. But I definitely suggest giving it a try and let your creative juices flow, it's really fun to see how they turn out!!

To the basic sugar cookie recipe I added a teaspoon of almond extract, they turned out super yummy! And I doubt you will ever find an easier sugar cookie recipe, I mean 5 ingredients?! In the words of Ina Garten "How bad can that be?!" I also used royal icing for the piping on my cookies, and
then this icing recipe for the flooding. You can use the royal icing for flooding as well, I just wanted to try both of them out. Next time I will probably do either or because it made extra work on my part making both types of icing. The royal icing gives the cookies a more matte look than this icing, which leaves the cookies looking glossy and perfect.

I hope some of you get a chance to try this out, it was really fun, however my kitchen does look like a bomb went off with royal icing and piping bags everywhere!..not looking forward to cleaning that up :) I will definitely be trying this again.

And please check back tomorrow for an outa this world chocolate cake recipe!!!

A great thing about this recipe is that because there is no
leavening agent, the cookies will come out exactly like
the cookie cutter you use.


Basic Sugar Cookies:
Makes Approximately 36x 10cm / 4" Cookies

200g / 7oz / ½ cup + 6 Tbsp Unsalted Butter, at room temperature
400g / 14oz / 3 cups + 3 Tbsp All Purpose / Plain Flour
200g / 7oz / 1 cup Caster Sugar / Superfine Sugar
1 Large Egg, lightly beaten
5ml / 1 tsp Vanilla Extract / Or seeds from 1 vanilla bean

Directions
• Cream together the butter, sugar and any flavourings you’re using. Beat until just becoming
creamy in texture.
Tip: Don’t over mix otherwise you’ll incorporate too much air and the cookies will spread during
baking, losing their shape.

• Beat in the egg until well combined, make sure to scrape down the sides of the bowl.
Add the sifted flour and mix on low until a non sticky dough forms.
Tip: I don’t have a stand mixer so I find it easier to switch to dough hooks at this stage to avoid
flour flying everywhere.

• Knead into a ball and divide into 2 or 3 pieces.
• Roll out each portion between parchment paper to a thickness of about 5mm/1/5 inch (0.2 inch)
• Refrigerate for a minimum of 30mins.
Tip: Recipes commonly just wrap the whole ball of dough in clingwrap and then refrigerate it for an
hour or overnight, but by rolling the dough between parchment, this shortens the chilling time and
then it’s also been rolled out while still soft making it easier and quicker.

• Once chilled, peel off parchment and place dough on a lightly floured surface.
• Cut out shapes with cookie cutters or a sharp knife.
• Arrange shapes on parchment lined baking sheets and refrigerate for another 30mins to an hour.
Tip: It’s very important you chill them again otherwise they’ll spread while baking.
• Re-roll scraps and follow the above process until all scraps are used up.
• Preheat oven to 180°C (160°C Fan Assisted) / 350°F / Gas Mark 4.
• Bake until golden around the edges, about 8-15mins depending on the size of the cookies.
Tip: Bake same sized cookies together otherwise mixing smaller with larger cookies could result in
some cookies being baked before others are done.

Tip: Rotate baking sheets half way through baking if your oven bakes unevenly.
• Leave to cool on cooling racks.
• Once completely cooled, decorate as desired.
Tip: If wrapped in tinfoil/cling wrap or kept in airtight containers in a cool place, un-decorated
cookies can last up to a month.

Royal Icing:

315g – 375g / 11oz – 13oz / 2½ - 3 cups Icing / Confectioner’s / Powdered Sugar, unsifted
2 Large Egg Whites
10ml / 2 tsp Lemon Juice
5ml / 1 tsp Almond Extract, optional

Directions

• Beat egg whites with lemon juice until combined.
Tip: It’s important that the bowls/spoons/spatulas and beaters you use are thoroughly cleaned and
grease free.

• Sift the icing sugar to remove lumps and add it to the egg whites.
Tip: I’ve listed 2 amounts of icing sugar, the lesser amount is good for a flooding consistency, and the larger amount is for outlining, but you can add even more for a much thicker consistency good for writing. If you add too much icing sugar or would like to make a thinner consistency, add very small amounts of water, a few drops at a time, until you reach the consistency you need.
• Beat on low until combined and smooth.
• Use immediately or keep in an airtight container.
Tip: Royal Icing starts to harden as soon as it’s in contact with air so make sure to cover containers with plastic wrap while not in use.

Decorating Your Cookies: Flooding
“Flooding” a cookie is a technique used when covering a cookie with Royal Icing.
1. You outline the area you want to flood which helps create a dam
2. Then fill or flood inside the area you’ve outlined

Decorating Your Cookies: Royal Icing
The most important thing when it comes to decorating with Royal Icing is the consistency.

There are two ways of flooding your cookies. Some like to do the outline with a thicker icing and then flood with a thinner icing. Some like to use the same icing to do both which saves time and you don’t have to have two different piping bags for each colour you’re using.

The Same Consistency Method
Consistency:
• Mix your royal icing according to the recipe/instructions
• Drag a knife through the surface of the Royal Icing and count to 10
• If the surface becomes smooth between 5 & 10 seconds, the icing is at the correct consistency
Tip: If your icing is too thick, thin it by adding a few drops of water. Mix, do the 10 second test, then if it’s still too thick, add a few more drops of water, repeat, etc.
Tip: To thicken your icing, add small amounts of icing sugar until thick enough for the 10 second test

Two Different Consistencies Method
Consistency:
• Mix your royal icing according to the recipe/instructions.
• Separate into 2 different bowls, one lot of icing for outlining, the other for flooding.
• For the outlining icing, drag a knife through the surface of the Royal Icing.
• If the surface becomes smooth at around 10 seconds, the icing is at the correct consistency.
Tip: If your icing is too thick, thin it by adding a few drops of water. Mix, count to 10 seconds, then if it’s still too thick, add a few more drops of water, repeat, etc.
Tip: To thicken your icing, add small amounts of icing sugar until thick enough for the 10 second test.
• For the flooding/filling icing, drag a knife through the surface of the Royal Icing.
• If the surface becomes smooth at around 3-4 seconds, the icing is at the correct consistency.
Tip: If your icing is too thick, thin it by adding a few drops of water. Mix, count to 3-4 seconds, then if it’s still too thick, add a few more drops of water, repeat, etc.
Tip: To thicken your icing, add small amounts of icing sugar until thick enough for the 3-4 second test.

Tuesday, August 24, 2010

Listen up people!! I've got a seriously good cookie recipe for ya!


Ok-so I may have already posted this recipe before...but I made them again and this time they are extra good! I mean Extra EXTRA good! They are Kathleen Kings Double Chocolate Almond Cookies (again i left out the almonds-not a huge fan of nuts in my cookies-sometimes they are ok). Wanna know why they were EXTRA good this time?? K I'll tell ya!

For the cocoa powder I used my new dutch process cocoa, Extra Brutte Cocoa Powder. This stuff is awesome. Such a deep, chocolately flavor. It took these cookies to another level. Can't wait to make them again!

they made lovely little gifts too:)

I've also decided I'm going to move away from cupcakes for a while and start making cookies. It was so nice yesterday when I made them to not have to worry about making an icing for them, not have to worry about decorating them...and quit frankly I would rather have one of these cookies than a cupcake. Gasp! I know! Crazy right?

Well tomorrow we are going on our first family vacation with out little one! Guess where we're going...I'll give you a hint...

our first stop will be to visit Lou Malnati's Pizzeria...
then the next day we are going to take a little drive to what I considered my home-where I grew up to get a delicious butter burger from Solly's Grille. This place is the birth place of the butter burger and I haven't had one in almost ten years so it's about time I go back and get me another!

If you haven't guessed, figured it out, or if you haven't gone to my lovely links :) ...You'll just have to wait till I post some pics tomorrow:)

I've posted the recipe for Kathleen cookies on my blog before, so you can look for it under "cookies" or you can go here for the recipe:)

Sunday, August 22, 2010

Unbelievable, Amazing, Whopper Cupcakes


This one is for all of those who love malted milk balls and who love malt in general. I mean, who wouldn't like malt?! It's simply the best! And when you put that delicious malted flavor into a cupcake..well your just pushing all the right buttons. I've made these cupcakes twice now, both times I have gotten rave reviews, especially about the frosting. It's quit possibly one of my favorite frostings ever. I got this recipe from the wonderful blog our recipe club.

The only thing I do differently with the recipe is the way I mix the ingredients together. I don't know why but the way this recipe says how to incorporate the ingredients together makes me nervous, even though I'm sure they would turn out just fine! But I am kinda weird in that when I make a cake I always add the dry ingredients into the butter/egg mixture alternating with the wet. So what I do is blend the oil, eggs, and vanilla together and I add the sour cream into the milk/malt mixture. After the eggs are blended into the oil mixture I add the dry and wet ingredients, begining and ending with the dry (I do 1/3 of the dry at a time, so you will do 3 additions of dry ingredients). So you can make these cupcakes with my mixing instructions if you are super anal like me, or just use the directions listed bellow in the recipe, because they will probably turn out just as good. Enjoy!


{natalie's super yummy Whopper cupcakes}

2 1/4 cup flour
1 1/4 cup sugar
3/4 cup unsweetened cocoa
1 1/2 tsp. baking soda
1 tsp. baking powder
1/2 tsp. salt
1 cup milk
1 cup malted milk powder
1 cup vegetable oil
3 large eggs
1 cup sour cream
1 tsp. vanilla


Preheat oven to 350 degrees. Line muffin tins with cupcake liners.

In a large mixing bowl, combine flour, sugar, cocoa, baking soda, baking powder and salt.

In a small bowl, combine milk and malted milk powder, stirring to dissolve. Add milk mixture, oil and eggs to flour mixture, beating at medium speed with an electric mixer until smooth. Add sour cream and vanilla, beating just until combined.

Pour batter evenly into prepared pans and bake for 15-17 minutes. Let cool in pans for 10 minutes. Remove from pans and let cool completely on racks.

Frost and garnish w/malted milk balls if desired


Malt Frosting

1 cup butter, softened
3/4 cup heavy whipping cream
1/2 cup malted milk powder
6-7 cup powdered sugar

Blue food coloring


In a large bowl, beat butter at medium speed with an electric mixer until creamy.

In a small bowl, combine cream and malted milk powder, stirring to dissolve. Add cream mixture to butter mixture, beating at low speed to combine. Gradually beat in powdered sugar until smooth. You may need to add more or less powdered sugar depending on desired consistency. Add 6 to 8 drops of food coloring, mix well. Add more if you would like a deeper color. Frost cupcakes, top with a Whopper-malted milk ball & enjoy!

Friday, August 6, 2010

Outa this world Peanut Butter Caramel Swirled Brownies

(photo courtesy of food network)


Ok, so since it's been a while-AGAIN- I decided to treat you guys to a yummy recipe:) A SUPER yummy recipe! For a while now I have been wanting to try Bobby Flay's peanut butter caramel swirl brownies he made for a throw down against Vermont's brownie company. The Vermont Brownie Company won with their dark chocolate chevre brownies (how good does that sound?!) However, after finally trying Bobby's recipe I am wondering if there should be a re match cause this recipe is a winner!

I have never been a fan of dark chocoate, but over the past year I have started to like it more and more. These brownies definitely have a rich, dark chocolately flavor. However, instead of using bittersweet chocolate I did use semisweet. I just thought the bittersweet would have been too dark for me. The peanut butter caramel is outa this world. My only complaint with this recipe is I wish there was more of the caramel. Next time I make them I am going to double the caramel and use about 3/4 of it for the brownies. I also would suggest not over doing it on the swirling-it's best when you have bigger globs of the caramel:)

One last note-the recipe says to bake the brownies at 325, but I did read one reviews of the recipe and they said you should bump the heat up to 350. Well I just baked them according to the recipe at 325, and after 22 minutes they were no where near to being done, so I kept them in the oven bumpepd it up to 350 and they were perfect in about 6 minutes. So maybe try baking them at 350, but don't over bake! They are supposed to be a very fudgey brownie! Enjoy!

o-and one other thing, I sprinkled a little bit of fleur de sel over the top of the brownies-to die for!!

Peanut Butter Caramel Swirled Brownies

Ingredients

  • 1/2 cup heavy cream
  • 1/4 cup sugar
  • 1/4 cup water
  • 1/2 cup smooth peanut butter
  • 1 tablespoon corn syrup
  • Pinch sea salt
  • 1/8 teaspoon vanilla extract

  • 1 cup (2 sticks) unsalted butter, cut into chunks
  • 6 ounces high-quality unsweetened chocolate, coarsely chopped
  • 2 ounces bittersweet chocolate, coarsely chopped, plus 4 ounces
  • 1 teaspoon espresso powder
  • 4 large eggs
  • 1 1/2 cups granulated sugar
  • 1/2 cup packed light brown muscavado sugar
  • 2 teaspoons pure vanilla extract
  • 1/4 teaspoon fine salt
  • 1 cup unbleached all-purpose flour

Directions

Bring the cream to a simmer over low heat in a small saucepan. Combine the sugar and water in a small saucepan over high heat and cook, without stirring until amber brown. Slowly whisk in the warm cream until smooth and let cook for 1 minute. Remove from the heat and whisk in the peanut butter, corn syrup, sea salt and 1/8 teaspoon of vanilla extract until smooth. Transfer to a bowl and let cool until thickened at room temperature, about 30 minutes.

Put a rack in the middle of the oven and preheat the oven to 325 degrees F. Line a 9 by 13-inch baking pan with foil, leaving an overhang on the narrow ends. Spray the foil and pan with nonstick spray.

Combine the butter, unsweetened chocolate, 2 ounces bittersweet chocolate and espresso powder in a medium bowl set over a pot of simmering water. Let the chocolate melt over low heat, stirring frequently until smooth. Remove from the heat and let cool slightly, about 5 minutes.

In a large bowl, whisk the eggs, both sugars, vanilla and salt until smooth. Whisk in the melted chocolate mixture until combined. Scrape down the sides of the bowl. Beat in the flour in 2 additions (the batter will be thick). Stir in the remaining 4 ounces of chopped bittersweet chocolate.

Scrape half of the batter into the prepared pan and smooth the top. Using a tablespoon, drop dollops of half of the peanut butter caramel every 2 inches over the top of the batter. Carefully add the remaining batter and smooth over the caramel. Smooth the top and dollop the remaining caramel over the top. Use a butter knife to swirl through the batter to get a marbleized effect.

Bake until the top is set but still soft and the edges are puffed and just beginning to pull away from the sides of the pan, about 23 to 25 minutes. A toothpick inserted in the center will come out still gooey (be brave!--underbaking the brownies is one of the secrets to their fudgy texture). Transfer the pan to a wire rack to cool completely.

For the neatest cuts, refrigerate the pan for about 20 minutes before cutting the brownies. Using the foil, lift the brownie slab out of the pan. Carefully peel off the foil and put the brownie on a large cutting board. With a large sharp knife, cut the brownies into 48 squares. (The brownies can be stored in an airtight container, at room temperature, for up to 3 days; they can also be frozen, well wrapped, for up to 2 weeks.)


Wednesday, July 21, 2010

4 years and one day ago....and lesson learned


Yesterday was our 4 year anniversary. 4 years! Wow-time flies when your having fun:) I remember on our last anniversary I was doing my lupron shots, and this year we have our little Eleni with us, I feel so lucky and blessed.

My parents, who are also our baby sitters, are out of town, so Eleni came on our date with us. We decided to just have a fun Salt Lake day and hit our favorite spots. First lunch at Trios. We got the rosemary flat bread which is my favorite! For my meal I got the butternut squash ravioli and Micah got the carbonara. They were both delicious.


Next we went to Hatch Family Chocolates where I got my favorite vanilla creams along with some raspberry cream chocolates and their coconut caramel. Now, I had heard that chocolate can make babies fussy if you eat it while breast feeding, but I thought "oh no it will be fine", so we then took off to minis cupcakes to grab some of my favorite cupcakes.

We got the Diva and Twisted Sister. Both full of chocolate and I ate them up. Hey it was my anniversary I could eat anything I wanted! We hung out in their Retro Cafe for a bit. It was so much fun, Eleni was in the best mood.


We then went to Orson Gygi and I grabbed a few things, then on our way home. So maybe not the most romantic annivesary but it was sure fun with our little peanut. Well...it was fun up to that point.

About 7:30 rolled around and Eleni started getting fussy so I started rocking her to sleep. She would fall asleep but fight it-start arching her back and kicking her legs, after an hour of this I just set her on the floor and she freaked out. And that's where it all began. Constant, horrible crying and screaming. It was awful. She has been so good, she has actually started to sleep through the night the past few nights and haven't had one freak out, so I knew it was the chocolate, darn it! I could tell she was in pain, that her tummy hurt. Then my tummy hurt cause I was sick to see my baby like this. I tried everything. She was screaming like I had never heard before, it was heart wrenching, finally at 11:30 (3 hours of straight crying/screaming) I told Micah he should give her a blessing, I couldn't think of anything else to do, so we said a prayer and he gave her a blessing.

He asked that her tummy would feel better and that she would calm down. I then laid with her in our bed and cuddled her up. After about 10 minutes she fell asleep. I don't know what I would do without the power of prayer and the miracle of priesthood blessings. I fell asleep too and Micah woke me up at 1:00 am because I was still in my clothes and everything. I put her in her crib and she slept till 6:30, and right now she is happily playing on her play mat.

So lesson learned, no more chocolate! That will definitely be an anniversary to remember. I'm hoping that the chocolate is out of my system and that we wont have another repeat today.

So I was meaning to post all about our anniversary yesterday but when Eleni started freaking out I just didn't have any time. But I'd like to give a quick shout out to my Hubby to tell him how much I love him:) I remember the day of our wedding like it was yesterday, one of the best days of my life. I'll never forget dancing the night away at our reception, and then later having people tell me after we left the DJ stayed because everyone still wanted to dance! I've heard stories of my dad (who is 6 foot 10) who started break dancing on the floor...wish I could have seen that:)

We've been through a lot the past 4 years, have traveled the world and have had many fun and amazing experiences, but I don't think anything we have ever done will compete with what lies ahead for us. Having a baby has been challenging and hard but also amazing. All we did yesterday was constantly take pictures of Eleni on our phone and camera, we couldn't take our eyes off of her, and when she would smile or make a cute face we would nudge eachother and say "hurry, look! She's making the most precious face!". She has brought both of us so much more joy than I think either of us could have imagined. I'm glad we got to spend our annivesary day with our little Eleni, I would have liked the later portion of the day to turn out a little differently but trust more, I've learned my lesson, no more chocolate!

Love you Micah and Happy Annivesary (yesterday:) ) Can't wait to celebrate many, many more with you!

some of my favorite pictures of our special day:)