Tuesday, December 20, 2011

Cookie Dough Oatmeal


Mmmm, doesn't that sound good? Well that's exactly what this oatmeal tastes like! A gooey bowl of cookie dough. I've been loving looking at the site Chocolate Covered Katie, she has a lot of fun ideas for putting healthy twists on desserts. I decided to give it a try and make a super yummy oatmeal. It turned out better than I expected. Yummy, chocolatey, gooey, warm.....and healthy! This recipe is a keeper, I'm planning on making this Christmas morning. Every time I have made this I didn't measure, so here is the recipe but you can always add a lil more of this or a lil less of that to your taste :)

Cookie Dough Oatmeal
serves 2

1 cup old fashioned oats
2 cups water
pinch of salt
1-2 tsp raw cacao powder (different than cocoa powder, cacao is really good for you, you can use cocoa powder, just would need more )
1 tsp vanilla
1 T agave nectar (little more if you want it sweeter)
1 T maple syrup (same as agave, more to taste:) )
semi sweet chocolate chips to sprinkle over top (or dark chocolate, to keep with the healthy theme)

Add oats, salt, and water in pan. Bring to boil and boil uncovered about 5 minutes. Remove from heat and add vanilla, cacao powder, agave, and maple syrup. Dish out in bowls, sprinkle on chocolate chips while it's hot (this is key so they will get gooey and melty). Add a little milk, almond milk, or soy milk to thin it out if needed. Sit down, dig in with a spoon and enjoy how delicioushly good this big bowl of oatmeal is for you!

Sunday, October 30, 2011

Whole Wheat Pita Bread

A few months ago when we visited Utah, my moms friend had us over to make some whole wheat pita's. It was so much fun. I have great memories in her kitchen, she taught me how to make cinnamon rolls, chicken noodle soup, and now pitas are on the list. These pita's are so easy to make and so much fun. There's just something about making some sort of bread that makes you feel like a super homemaker. The great thing about these is you can make a bunch and then store them in the freezer. The other night I made these for dinner along side some lentil and vegetable soup. I lightly drizzled the pita's with melted butter, then topped with garlic salt and oregano. Hello deliciousness! It was so yummy, I see a lot of pita's in our families future:)

first, we need to start with some good yeast, I use saff instant (can get it at costco)

dump it with everything else in mixer, and smile for the camera because let's face it,
you are super cool making pita bread:)
Now we pat one of our ten balls of dough flat into a disc before rolling,
this makes it easier to make a round pita.
Cover with flour
Let rise 30 min....
Turn over before baking and bake 5 min at 500 degrees, and viola! We made pita bread!
Imagine the possibilities of things we could stuff in there, peanut butter and apple,
greek salad, or just eat it right out of the oven warm. Mmmmmm

Yummy Pita's to use later, or store in freezer to have on hand all the time!So go ahead, take a whack at it! These are easy peasy, and I guarantee you will love them!
And like I said, you will feel like a star homemaker once you break out the yeast and
you have flour on your cheeks. And just think of the healthy goodness you are feeding
your family! :)

Whole Wheat Pita Bread

3-4 c. whole wheat flour
1 1/4 c. hot water (hotter than warm, but not too hot)
1 T. yeast
1/2 tsp. salt

mix together in bread mixer. Dough will be heavy-divide into 10 pieces. Roll each piece flat. Let rise 30 min. Turn over before baking. Make sure both sides are covered with flour. Turn over before baking. Bake at 500 for 5 min. Store while warm in plastic bread bag.

Sunday, September 18, 2011

Unbelievable Vegan Coconut Chocolate Chip Cookies


Ok, I know I said I was going to post about my banana bread french toast-but I just made these cookies today and couldn't wait another second before sharing them. These cookies are unbelievable!!!! Seriously so amazing. I adapted my favorite chocolate chip cookie a bit and added some kamut flour and replaced the egg with a flax egg (to make a flax egg you just mix 1 T ground flax with 3 T water). I couldn't believe how delicious these cookies were. The kamut made them a little crispy on the outside, but on the inside, an amazing gooeyness that is almost impossible to acheive when making a cookie. I can't wait to make these for my little peanut who is allergic to eggs. My guess is no one would ever think theses were a vegan or "healthier" cookie. They are just simply delicious. So delicious that I may have eaten 4 right when they came out of the oven....and have lost track after my last few....oops.

Enjoy!

Vegan Coconut Chocolate Chip Cookies
1/2 cup coconut oil
2 flax eggs (2 T ground flax mixed with 5-6 T water, start with 5 then add more if you need to, 5 was perfect for me, let sit for a few minutes to thicken)
1 1/2 cups brown sugar
1/2 teaspoon salt
1 teaspoon baking powder
1/4 teaspon baking soda
1 tablespoon vanilla
1 cup kamut flour
3/4 cup flour
12 oz semi sweet chocolate chips
1/2 shredded
coconut
In a large bowl, use an electric mixer to beat together coconut oil, eggs, and brown sugar until very well mixed. Add remaining ingredients, mixing together until all are incorporated. Use a cookie scoop and place on cookie sheet, 6 to a sheet. Bake in an oven preheated to 400 degrees for 9-11 minutes, or just until the outside of the cookies have browned ever so slightly around the edges. Remove, cool slightly, devour.

Saturday, September 17, 2011

Back from Utah and Some Changes...

We got back about a week ago from a two week stay in Utah. Sorry for the long absence, but it's been really good to visit with family and come back and try and catch my breath from the long vacation. But since I have been back, there have been some exciting things happening in my kitchen!! Let me explain... :)

While I stayed with my mom in Utah we watched the movie "Forks Over Knives" it's a documentary that encourages a plant based diet vs the high intake of dairy and meat that we normally eat in our western diet. It was an amazing documentary. Very informative and very inspiring and encouraging. I think I discovered I had a passion for health when I was in high school. I also have always had a passion for the sweet things in life so I often found myself conflicted. My mom always instilled within us kids a good foundation of nutritional principles. We never had "junk" around our house and when we did it was when my mom made a special treat. Now that I have started my own family my passion for health has increased because I feel such a sacred responsibility to provide the best for my child. And to me, one thing that means is giving my child the best nutrition possible so she can have the best chance at a healthy and long life.

I have read many nutritional books, my favorite being "Eat to Live" by Dr. Joel Furhman, and after watching "Forks Over Knives" I feel like I know too much to keep eating the way I have been eating. After gaining this knowledge I feel it would be completely irresponsible for me to not do the best I can to live what I feel to be right. I hope everyone is picking up on how I keep saying "to me" and "I feel". This is a personal realization and I in no way shape or form am forcing what I think upon anyone:) So....what does this mean? Well I have eaten the past week a vegan, very high plant based diet. And I'd love to share with you what that experience has been:)

First of all, it's been FUN! Micah and I don't really drink milk, we also don't eat a lot of cheese, and we have a child with an egg allergy so it's been a pretty easy transition. I've taken Eleni off of milk, which I have been giving her at least 18 ounces a day since she was 12 months since I stopped nursing, because that's what the Dr advised me to do. After learning what I know about milk I am sad I've given her so much for so long. But now that has changed. I have made some of the yummiest food I have ever made this week. Micah and I have had so much fun talking about how yummy everything has been and how good we feel! One of the biggest changes I have noticed, in just a week, is how much peace I feel in my body. I would say I have struggled with anxiety for the past 5 years, if not more. I have never taken medication for it, just dealt with it. However, after filling my body with such good food this week and after cutting out much sugar, my anxiety levels are little to none. Which is like finding a pot of gold! If anyone has ever struggled with anxiety you know what a prison that can feel like, I feel like I have broken out of that foggy prison and my mind is seeing clearly and I feel so much peace of mind. So that's very exciting.

I haven't posted about this yet until I knew I was going to be serious about eating this way. Does this mean I will never have cheese? No. Does this mean I will never eat a cupcake or indulge in some cake bites when I visit Utah? Absolutely not:) BUT, it does mean I will cook this way at home. No meat, almost no dairy, maybe very little amounts of cheese here or there. And when we go out with friends or eat at others houses, that's where I will bend a little bit if I have to or want to. I will probably still make deserts from time to time, so when I post a yummy, indulgent treat, please don't call me a hypocrite:) I believe in moderation. However, after eating this way and learning a lot about what kinds of foods are best for the body, my desire to eat the things I used to has naturally fallen away, without me restricting myself and forcing myself to "Go Off Sugar", which I have done I don't even know how many times.

I know I will have good moments and bad moments, like all of us do. And I may fall off for a little bit, but what's important is that I always get back on. I think another aspect that has helped me eat this way with ease is learning about where our dairy and meat comes from. I will not be joining the PETA group any time soon:) but I have been saddened to learn what cows have to go through to give us the milk we drink and the burgers I used to love. I think I have always wanted to "not know", but after knowing it makes me rethink what I want to eat. Again, I still may have a burger on a very rare occasion, just not how I used to.

Ok, is that long enough of a post for ya?? I can't wait to start sharing with you all of the yummy recipes I have been making! I decided not to post one today because this is a very long post, but I can't wait to share with you the AMAZING vegan french toast I made today! It's really been a joy for me to cook this way, it's brought a level of happiness to me that I can't explain. Perhaps because of how good I feel inside, and how right it feels to feed my family this way. It's also made me start thinking about perhaps getting a nutrition degree.

If anyone is interested in watching "Forks Over Knives" you can stream it instantly from Netflix.

Happy, Healthy, Cooking:)

Monday, August 29, 2011

Black Bean Tacos


Can we just pretend that the picture above is a beautiful, nicely arranged plate of tacos? Can we just pretend that I didn't take a picture of them in two seconds right before I scarfed them? Because let's face it, sometimes by the time I make dinner I don't have the will power to wait on eating my plate of food before I can arrange it for a photo. This was one of those times-but now that all of our imaginations are in gear, let's talk about these super yummy black bean tacos!

I am always looking for ways to make vegetarian versions of things (by the way, if any of you have good vegetarian main dish ideas please pass them my way!) I am not a vegetarian by any means, but I do try to cook with meat only once a week, sometimes less. I've seen tacos made with TVP, but never thought that sounded very good (but I could be wrong!) So I decided to replace the meat called for tacos with black beans. I get the big spice jar of taco seasoning from costco and just followed the directions but replace the black beans for the meat. I didn't know how these would turn out, I guessed that they would be decent, but I never would have guessed that they would be amaaazing! They were seriously so good that I am excited to say I have my vegetarian version for tacos that I think I will stick to forever. They are better for you, cheaper, and just as good if you ask me. Little Eleni loved the beans, which is always nice:) I will post the recipe that I kinda made up, but it really is a "add a little bit of that, maybe a little more of that " recipe:)

Black Bean Tacos
makes 4-6 tacos

1 can black beans
1/2 cup water
2-4 tablespoons taco seasoning (I did 2ish because I didn't want it too spicy for Eleni, but if I didn't have to worry about that I would have done more)

*simmer black beans, water, and seasoning about ten minutes. Then it's ready to stuff into your taco shells! Top with your toppings and give it a fresh squeeze of lime:)

Toppings (of course you could do whatever you liked, but this is what I did)
lettuce
avocado
red onion
queso fresco (i used feta but queso fresco would be better)
thinly sliced red onion
fresh cilantro
lime

Tuesday, August 23, 2011

A Peanut Butter Pie For Mikey


This peanut butter pie is to honor Jennifer Perillo's husband Mikey, who recently passed away. You can read what she said on her post here. I just stumbled upon Jennie's blog through Bakerella. I saw so many within the blogging community making peanut butter pie's for Mikey, because that was his favorite. Jennifer on her blog said so many people were asking what they could do and she told them to make a peanut butter pie for someone they loved, and hug them like there's no tomorrow because today is the only guarantee we can count on. So one peanut butter pie for Mikey, and a big hug to my Micah. I can't imagine what Jennifer is going through, it breaks my heart to know that in this life she wont be able to hug her sweet husband and her little girls wont be able to see their dad. But I have faith and believe that they will be together as a family one day.

Big Hugs and Kisses to all of my family and friends, especially my family in Utah who I love so much!

Creamy Peanut Butter Pie

Serves 10 to 12

8 ounces chocolate cookies

4 tablespoons butter, melted

4 ounces finely chopped chocolate or semi-sweet chocolate chips

1/4 cup chopped peanuts

1 cup heavy cream

8 ounces cream cheese

1 cup creamy-style peanut butter

1 cup confectioner's sugar

1 – 14 ounce can sweetened condensed milk

1 teaspoon vanilla extract

1 teaspoon freshly squeezed lemon juice

Add the cookies to the bowl of a food processor and pulse into fine crumbs. Combine melted butter and cookie crumbs in a small bowl, and stir with a fork to mix well. Press mixture into the bottom and 1-inch up the sides of a 9-inch springform pan.

Melt the chocolate in a double boiler or in the microwave. Pour over bottom of cookie crust and spread to the edges using an off-set spatula. Sprinkle chopped peanuts over the melted chocolate. Place pan in the refrigerator while you prepare the filling.

Pour the heavy cream into a bowl and beat using a stand mixer or hand mixer until stiff peaks form. Transfer to a small bowl and store in refrigerator until ready to use. Place the cream cheese and peanut butter in a deep bowl. Beat on medium speed until light and fluffy. Reduce speed to low and gradually beat in the confectioner's sugar. Add the sweetened condensed milk, vanilla extract and lemon juice. Increase speed to medium and beat until all the ingredients are combined and filling is smooth.

Stir in 1/3 of the whipped cream into the filling mixture (helps lighten the batter, making it easier to fold in the remaining whipped cream). Fold in the remaining whipped cream. Pour the filling into the prepared springform pan. Drizzle the melted chocolate on top, if using, and refrigerate for three hours or overnight before serving.

Thursday, August 18, 2011

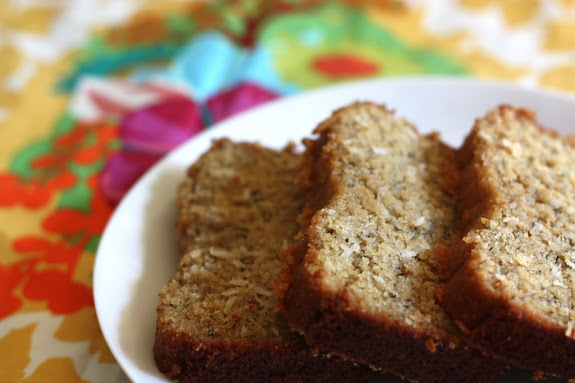
Coconut Banana Bread with Lime Glaze


I have a confession. I hate bananas. I just can't get around their mushy texture. I've tried to like them-I really have, but to no avail. However, I LOVE banana bread. This sometimes presents a problem for me. For example, why don't we take a look at the last few weeks. I bought a bunch of bananas and waited for them to get nice and ripe so I could make banana bread. The day finally arrived when they reached their perfect "ripeness", so I decided to make this coconut banana bread recipe I've wanted to try. Well, I started mashing a banana and couldn't do it anymore. It literally made me sick! I'm not kidding-I know I am sounding like a five year old but dry heaves were in the air people! I don't know why their mushy texture makes me so sick....anywho....

I decided to give it another try. Bought more bananas, waited till they were ripe, and gave it another go. Even though I got a little gaggy mashing the bananas I pressed on! And boy am I glad I did! This banana bread rocks! It's so delicious and of course I have a love affair with coconut so the coconut made it that much more delicious. It was my first time using kamut and I loved it. No one would ever have guessed it was made with anything but white flour. I can't wait to use kamut a lot more. Why use kamut? A few fun facts about it is that it has less gluten than wheat and more protein. I hope you have a chance to make this delicious bread, I know you will be more mature about it than me and not get grossed out by your bananas...

A couple things I did differently: I used coconut milk instead of buttermilk, I used half butter and half coconut oil because I was almost out of coconut oil, and I omitted the lime glaze because I didn't have limes.

Coconut Banana Bread with Lime Glaze
from Unconventional Kitchen

2 C flour, I used kamut, but whole wheat would work as well
3/4 tsp baking soda
1/2 tsp salt
1 C sucanat** (or raw sugar if you don’t have sucanat yet)
1/4 C coconut oil, softened
2 large eggs
1 1/2 C mashed ripe bananas (about 3 large bananas)
1/4 C plain yogurt
3 Tbs buttermilk (or any type of milk, almond, rice dream etc.)
1 tsp vanilla extract
1/2 C coconut, unsweetened

Topping: 2 Tbs additional coconut
Glaze: 1/3 C agave with 2 T lime juice

1.Preheat oven to 350 degrees.
2. In a mixing bowl cream together coconut oil and sucanat.
3. Add in eggs, yogurt, vanilla, and apple juice (or milk) beat until smooth.
4. In a separate mixing bowl, add flour, baking soda, salt, and coconut, mix until smooth.
5. Mix together the dry ingredients to the wet ingredients, do not overmix.
6. Fold in the mashed bananas.
7. Pour into a greased 9×5 loaf pan and sprinkle with remaining coconut.
8. Bake at 350 for 55 minutes (if coconut starts getting too brown, cover with tinfoil the last 15 minutes of baking).
9. While bread is baking whisk together agave and lime juice.
10. Drizzle over the hot bread and go ahead and eat a piece right out of the hot pan, you deserve it!
11. Then let it cool 15 minutes and slice it.


Tuesday, August 16, 2011

Quinoa and Peas side dish


I love Quinoa. We eat it all the time. My little one eats it just about every day. I am always looking for new ways to jazz it up and serve it as a side. The other night I thought was a definite take out night. I felt like I had zero food options at home. However, I decided to be creative and save money and just try to make something with what I had. So, I created a quinoa and pea dish with red onions. I then served it with a side of broccoli. Ok-not the most exciting dinner, but I didn't' spend any money on take out and I felt so proud of myself! I would normally serve this quinoa dish as a side but it also made a great main dish with another side of vegies. It's quick, easy, yummy, and healthy. Those four words usually don't go together so I would say my creation was a winner:) I will do the best I can to re-write the recipe. But it's not an exact recipe so just use as much onions or peas as you want. Enjoy!

Quinoa and Peas

1 cup quinoa
2 cups chicken stock, vegetable stock, or water
1/4 - 1/2 cup of red onion, diced
About a cup of cooked peas (more or less if you want)
salt and pepper to taste
olive oil

Place quinoa and liquid in pot. Bring to a boil. Cover, and let simmer for fifteen minutes. Meanwhile, cook onion over medium heat in a little bit of butter. Cook until onions are translucent. When quinoa is cooked, add onions and peas. Season with salt and pepper and serve with a drizzle of olive oil.

Monday, August 1, 2011

Healthified Scotcharoos


Is it just me, or is it the best thing ever when you find a "healthified" version of a desert and it's even better than before?! I honestly get so excited when I make better for you treats and they are delish! This desert is one of my favorites I have made in that regard. I got the recipe from unconventional kitchen-I think Desiree is a genius in the kitchen. These have no high fructose corn syrup, just honey and brown rice syrup to sweeten them. I made them for a little dinner I hosted last night with some friends and everyone was raving, I even got a comment that they were better than original scotcharoos! The only problem with them is I started picking at them for breakfast, and one little bite led to another and before I knew it I was down to one last piece! So I quickly snapped a picture of the last piece so I could post this wonderful recipe. Can't wait to make these for my kiddies and put them in their lunches for school! :)

Scotcharoos Made Healthy-ish
from the Unconventional Kitchen

1 1/2 C peanut butter – I use Costco organic brand, or Adams without added sugar and oils
1 C honey
3/4 C brown rice syrup (you can get this at the health store)
6-8 C crisp brown rice cereal (you can get this at the health food store, or substitute your favorite healthy cereal)
2 C dark chocolate chopped or dark chocolate chips

1. Melt peanut butter, honey,and brown rice syrup over low heat.
2. Once all of the mixture is all melted and mixed together well add the cereal.
3. Mix all of it together and press it into a 9×13 pan.
4. While the rice krispie part is cooling, melt the chocolate chips over low heat. I just use the same pan for this part, I hate doing dishes.
5. Spread the chocolate chip mixture over the rice krispie base, put in the fridge to let cool and soften.
6. Try not to eat the whole pan!

Monday, July 25, 2011

Soft Frosted Sugar Cookies


I am always on the look out for the best sugar cookie. In fact, this is probably my third or fourth sugar cookie recipe on my blog. I guess I am always on the hunt for the perfect soft sugar cookie, and thanks to annie's-eats for posting this recipe, I think I have found it!

These cookies are everything a sugar cookie should be: soft, flavorful, easy, delicious. Probably not the best cut out sugar cookies, but that's another thing I like about this recipe, you don't have to worry about cutting them into shapes, scooping them onto the sheet is good enough. This recipe definitely ranks up there with one of my faves. I really think I should make every sugar cookie recipe I have one day, do a taste test and really see which one is my favorite:)

I did a few things different. I am out of vanilla (I know! Blasphemy!) so I had to be creative. Instead of vanilla I added a half-teaspoon of butter-vanilla bakery emulsion and a half-teaspoon almond emulsion (emulsions are more flavorful than extracts and don't cook out when baked). I also halved the recipe, which was a smart move on my part because it probably would have been scary how many I would have eaten if they were around. One day I will have self-control when it comes to sweets. One day:)


Soft Frosted Sugar Cookies

Yield: about 2 dozen large cookies
Ingredients:
For the cookies:
4½ cups all-purpose flour
4½ tsp. baking powder
¾ tsp. salt
1½ cups (3 sticks) butter, at room temperature
1½ cups sugar
3 large eggs
5 tsp. vanilla extract

For the frosting:
5 cups confectioners’ sugar, sifted
1/3 cup (5 1/3 tbsp.) unsalted butter, melted
1 tbsp. vanilla extract
7-8 tbsp. milk (plus more, as needed)
Food coloring (optional)
Sprinkles (optional)

Directions:
To make the cookies, preheat the oven to 350˚ F. Line baking sheets with parchment paper or silicone baking mats. In a medium bowl combine the flour, baking powder and salt, and whisk together to blend. In the bowl of an electric mixer, combine the butter and sugar and beat together on medium-high speed until soft and fluffy, about 2-3 minutes. Beat in the eggs one at a time, mixing well after each addition and scraping down the bowl as needed. Blend in the vanilla. With the mixer on low speed, add in the dry ingredients mixing just until incorporated and evenly mixed. Cover and chill the dough for 1 hour.

When you are ready to bake the cookies, scoop a scant quarter cup of dough and roll into a ball. Flatten the ball slightly and place on the prepared baking sheet. Repeat with the remaining dough, spacing the cookies at least 2-3 inches apart. Bake about 10-12 minutes or just until set. (Do not overbake! The edges should be no more than very lightly browned if at all.) Let cool on the baking sheet for several minutes. Transfer to a wire rack to cool completely.

To frost the cookies, place the confectioners’ sugar in a medium bowl. Add the melted butter, vanilla, and milk to the bowl and whisk until smooth. Whisk in additional milk as necessary, 1 teaspoon at a time, until you reach your desired consistency. Tint with food coloring if desired. Use an offset spatula or spoon to frost the cooled cookies. (If the frosting begins to thicken as you decorate, just continue to whisk in small amounts of milk to keep it workable.) Top with sprinkles if desired. Store in an airtight container.

Source: adapted from Hostess with the Mostess


Thursday, July 21, 2011

5 Years and Counting...

Yesterday was our 5 year wedding anniversary. I can't believe it's been 5 years! Since we live in Chicago away from family, it was a little difficult to try to find a baby sitter. So, our little rug rat was the third wheel on our anniversary date, same as last year:) But it ended up being really fun. We went to my favorite restaurant here, Tasso's. I've been a little obsessed with Greek food lately. I think it's safe to say it's my favorite kind of food now. I've eaten such good Greek food here that I'm completely hooked, I think my husband is getting a little annoyed because every time we want to go out to eat I suggest a Greek place and he always reminds me how the last place we ate at was Greek. I just tell him that if we lived in Greece, we would eat it for every meal:) But if you are in the Naperville area in Illinois at all, you have got to go to Tasso's! They have this appetizer called flaming cheese-it's pretty much the best thing in this world! They take a big chunk of the most amazing cheese, pour ouzo on it and then light it, and viola-flaming cheese! They then squeeze lemon juice over it. It's really so good. The waiters there are so friendly and sweet.

Here are some pics of our anniversary night-filled with-none other than lots of yummy, yummy food:)

Flaming Cheese! Our waiter Jimmy was awesome:)
You can tell what a joy Eleni was to have at dinner:)

Happy Anniversary Micah! Love ya:)

Wednesday, July 13, 2011

Hello, I'd like you introduce you to something...


...your new, tastiest best friend. With a marshmallow center, coated in creamy caramel, then smooth white chocolate, and finished off with a sprinkling of jello powder-yes-jello powder. My mom tried these bad boys at a baby shower she went to a while ago, she gave me a call and told me about them and I knew I just had to try them! Neither my mom or I are big marshmallow fans, but we love these! I mean....just look at them!

Ok ok, so they don't LOOK perfect, I had some issues with the dipping. My sis in law helped me dip them for a baby shower we made them for. It was a boy baby shower, but we didn't like the blue jello powder as much as pink strawberry powder, so they turned out pink but I don't think anyone minded:) I hope next time I try these they will look more appealing, it was a little tricky trying to keep them upright after dipping them in the caramel.

The caramel I used for this is soooo yummy! You can use it to dip pretty much anything in it. So here's the recipe, and I'm off to have my third marshmallow pop for breakfast....is that bad?? Ok-it might be kiiiinda bad but it tastes o so good!

There's one problem, I haven't found any recipes for this type of caramel covered marshmallow pop with the jello powder on them....so they don't technically have a name...so let's call them...Heaven on a Stick!

My sis in law and I at the baby shower we displayed the pops at,
wanna know a secret about her?? She's got two babies in her tummy! :)


Heaven on a Stick Marshmallow Pops

INGREDIENTS:

10 oz bag regular marshmallows
1 can (14 oz) sweetened condensed milk
1/2 stick butter
1 teaspoon vanilla
1 bag (14 oz) caramel candies, unwrapped
1 bag vanilla candy melts in your choice of color
About 20 lollipop sticks
Box of jello powder (the best flavor I have found so far is strawberry, but you can use any color/flavor you want)
Parchment paper
Cut lollipop sticks in half and insert into marshmallows.

Combine condensed milk, butter, and vanilla in a large saucepan over medium heat and cook until the butter melts and combines with the milk. Bring to a boil and cook, stirring constantly for 1 minute. Stir in the caramels and cook, stirring constantly until the caramels melt and the mixture is smooth. Reduce heat to low and simmer the caramel, stirring one minute longer.
Remove from heat and dip the marshmallows in the caramel, covering about 2/3 of the marshmallow. Place dipped marshmallows on a parchment paper lined cookie sheet and place in the freezer for about 30 minutes, or until caramel is hardened and is easily lifted from parchment paper.
Melt candy melts in a bowl according to instructions and dip the caramel marshmallows in the melted candy. Immediately sprinkle on the jello powder.

Monday, July 11, 2011

Sunday Dinner: Rosemary Garlic Salmon


Last summer Micah and I were on a grilling kick. We tried grilling everything, but our best creation we ever grilled was a rosemary garlic salmon. I got Micah a grill for Father's Day so we decided to try out our salmon again. It's so super easy to make, we have even made them on our panini press before. It's really a fool proof recipe because you wrap the salmon up in foil and put it on the grill, so you don't have to worry about it falling apart. We like to serve our salmon with grilled zucchini and onions. I also cooked up some boiled potatoes and made a rosemary butter to toss them in. So good! This meal has such yummy, fresh, summer flavors. We may have to make this once a week:)

Now this is now an exact recipe since we just made it up, so I will do my best to figure out the portions of everything:)

Garlic Rosemary Salmon

Samon fillets
few cloves of garlic
few sprigs of rosemary
oilve oil
salt
pepper
lemon slices

Set a salmon fillet in a sheet of tin foil. Drizze with olive oil, then salt and pepper to taste. Mince a couple cloves of garlic and spread on salmon (you can do as little or as much as you like, I probably do 1 1/2-2 gloves per fillet, depending on size of garlic cloves). Then lay a few sprigs of rosemary over garlic, then top with a few slices of lemon. Wrap up well in foil, making sure edges are sealed so no juices get out. Throw on grill for about 10 minutes, depending on thickness of salmon. Like I said, you can also throw it on a panini press, check after 10 minutes also.

Grilled zuchini and onions

Coat with olive oil, then salt and pepper. Cook on grill a couple minutes each side, they don't take long to grill. We've also done asparagus before, cook same way:)

Rosemary Butter
(this is the recipe I use to toss my boiled potatoes in, this butter would also be amazing on steak or lamb.)
2 to 3 cloves garlic, minced
1 Tbl fresh rosemary leaves, removed from the stem
1/2 tsp orange or lemon zest (I used lemon)
1/4 tsp crushed red chili pepper
1 stick butter, softened

Combine all of the ingredients. Make a log by spreading the mixture across a length of waxed paper. Roll the log back and forth to make a smooth tube about 1 1/2 inches thick. Twist the ends and store in the refrigerator or wrap airtight and store in the freezer. *If you are going to use this to toss with potatoes, I'd recommend melting it a little before tossing. After dumping potatoes in a collander to drain, just put the butter right in the bottom of the hot pot so it melts a little before putting potatoes back in.

Friday, July 8, 2011

Not so Cheesy Mac and Cheeze

Hey everyone! I just got back from Utah a couple days ago for about a two week visit. It was a blast! But, now life goes in, we are back in Chicago and I am back in the kitchen:)

I bought some nutritional yeast a while ago for a RAW dip I made...I actually should post the recipe because it was really good! Ok, making a mental note to post that next:) Anyways, a couple days before we left for Utah I wanted to make something simple, use ingredients I already had, and make something both my 14 month old and husband would like-that seems to be a challenge sometimes. I found a vegan mac and cheese recipe on the internet that called for nutritional yeast. I have been wanting to use up my nutritional yeast because it is so good for you but just haven't known how to use it so I thought this would be a good experiement. I made this cheezey sauce and put it over whole wheat pasta. I decided not to tell Micah that it in fact didn't have any cheese in it and just wanted to see how he would act:)

Micah came home from work and saw me making the mac and cheeze, he got so excited and said "You're making homemade mac and cheese!" O boy- I thought, this better be good! He took one bite and said "this is so good!" Micah hates whole wheat pasta and he said "This sauce even makes me like whole wheat pasta!" I kept bugging him and asking "Do you really like it? I mean really?? Or are you just saying that?", he finally caught on and said "Is there something secret about this mac and cheese, like there's no cheese in it or something?" I caved and told him, he couldn't believe it. The best part of all is that Eleni loved it! I'm excited to have a new staple in my home, and if I raise my kids eating this mac and cheese they will never know the diference:)

A happy baby makes a happy mom:)

O-and I didn't bake mine, just put the sauce right on top of the pasta! Yum!

Mac and Cheeze
from vegweb.com serves 8

2 cups elbow macaroni
1/2 cup flour
1/2 cup nutritional yeast
1 teaspoon salt
1 teaspoon garlic powder
1/2 teaspoon onion powder
pinch paprika
2 pinches mustard powder
1 1/2 cups plain unsweetened nondairy milk (I use soy)
1/2 cup veggie broth
1 teaspoon umeboshi vinegar, optional (makes it saltier) (I left out)
1 teaspoon prepared yellow mustard (I left out as well-Micah hates mustard so we never have it)
1 tablespoon tamari or soy sauce
2 tablespoons vegan margarine (I actually used regular butter, so mine wasn't 100% vegan)
1/4 cup breadcrumbs, optional

Directions:

1. Preheat oven to 350 degrees F and lightly spray baking dish, if baking. Cook pasta according to package directions. In the last 4-5 minutes of the pasta cooking, start making the sauce. Combine all dry ingredients (flour, nutritional yeast, salt and spices) in a medium pot. Do not turn on heat yet.

2. Add the milk and veggie broth. Whisk to incorporate all ingredients and get all the lumps out. Now turn on the heat to medium high. Keep whisking/stirring as the sauce heats because it will start to get thick pretty fast. Once it gets nice and thick. turn off the heat and add the umeboshi vinegar, mustard, soy sauce and vegan margarine.

3. Mix well. If you didn't use the umeboshi vinegar, you can add more soy sauce if you think it needs it. If your sauce ends up too thick to your liking, just add a little more milk or veggie broth to thin it out. When pasta is finished cooking, drain it and put it back in the pot that it was cooked in.

4. You have 2 options to serve this. You may go ahead and pour all of the cheese sauce on the pasta (there will be a lot!) and stir until everything is combined. Serve the cheesy goodness as is.

5. Or, you can mix about 3/4 of the sauce with the pasta, put it in prepared dish, and then pour the remaining cheese sauce on top. Sprinkle breadcrumbs on top and bake for 15 minutes, until browned.

Thursday, June 16, 2011

Angel Hair Pasta Primavera


Even though, here in Chicago, it doesn't look or feel like summer (we have had a few good days, but a lot of gloomy, rainy days as well), I am still excited to start cooking with summery flavors and ingredients:) When I think of summer, I think of fresh basil, crisp vegies and gorgeous juicy berries. I also like to make summer pasta dishes, loaded with summer vegies, fresh herbs, and pesto. So I decided an angel hair pasta primavera would be perfect for our Sunday dinner.

This recipe we really delicious. But let's be honest, any recipe involving a half stick of butter and a half cup of heavy cream is destined for yumminess:) Hope you have a chance to make this, it's great way to use up some of that fresh basil I know you have growing in your yard and I'm sure I'm the only slacker who hasn't started on their herb garden yet. Any other slackers out there?? :)

Classic Pasta Primavera Recipe

  • Prep time: 20 minutes
  • Cook time: 10 minutes

Ingredients

  • 1/2 pound angel hair pasta or spaghetti
  • 1 small bunch broccoli, about 1 heaping cup of florets
  • 1 small zucchini, diced
  • 4 asparagus spears
  • 1/2 cup peas, fresh or frozen
  • 1/2 cup snow peas
  • 3 minced garlic cloves
  • 3 Roma or other paste tomatoes, seeded and diced
  • 12 basil leaves, chopped
  • 4 Tbsp. butter
  • 1/4 cup chicken broth (use vegetable broth for vegetarian option)
  • 1/2 cup heavy cream
  • 1/2 cup grated parmesan cheese
  • Salt

Method

1 Get a large pot of water boiling. Salt it well. It should taste like the sea. Fill a large bowl with ice water. Boil the broccoli for 1 minute. Add the asparagus and boil another minute. Add the snow peas and boil for 30 more seconds. Remove all the vegetables and plunge them into the ice water. Once they’re cool, drain in a colander.

If you want, you can boil your pasta in the same pot you boiled the vegetables in, or you can start over and boil new water; I use the same water.

2 In a large sauté pan, heat the butter over medium-high heat. When the butter is hot, add the garlic and zucchini and sauté 1 minute. Add the diced tomatoes and sauté another 2 minutes, stirring often.

3 Pour in the chicken or vegetable broth and turn the heat to high to bring it to a boil. Add the cream and toss in all the vegetables you boiled, plus the peas. Stir to combine. Turn the heat down until the cream-chicken broth mixture is just simmering, not boiling.

4 Add the parmesan cheese and stir to combine. If the sauce seems too thick – it should be pretty thick, but not gloppy – add some more chicken broth, cream or water.

5 Boil the angel hair pasta. Note: If you are using spaghetti, you will want to start cooking it before you begin sautéing the garlic and zucchini. Angel hair will only need 1-2 minutes to cook, vermicelli or spaghetti can take 8-12 minutes.

As soon as the pasta is done, transfer it with tongs into the sauce and stir to combine. Add the basil now, and taste for salt. Add salt if needed. Grind some black pepper over everything and serve immediately.

Yield: Serves 4.

Monday, June 6, 2011

The Birthday Cake


It's been a month since Eleni's first birthday-and I still haven't posted about it! The reason? Ok I have to be honest-I took a lot of pictures and I am a little intimidated to go through them all and pick my favorites to put up! But I shouldn't be so picky and should just post about it already:) But because I am still a little indecisive, I decided to show you her birthday cake. I've always wanted to make a ruffle cake, I think they are one of the cutest things ever;) And since I think my little girl is one of the cutest things ever I thought it would be perfect for her own little personal cake she could dive right into. This cake was not only cute, it was delicious too. Bellow are directions for making the ruffles, or you could check out this lovely video, it explains how to do the ruffles really well:)

O-and my ubber talented sis in law Kori is responsible for that darling "E" on top of the cake, sooo cute!!!

Tender Lemon Cake

Ingredients

  • 12 tablespoons (1 1/2 sticks) unsalted butter room temperature, plus more for pans
  • 2 1/4 cups sifted all-purpose flour
  • 2 1/4 teaspoons baking powder
  • 1/4 teaspoon salt
  • 1 1/2 cups sugar
  • 3 large eggs
  • 3/4 cup buttermilk
  • Zest of 1 lemon

Directions

  1. Heat oven to 350 degrees. Butter an 8-by-2-inch round cake pan. Line with parchment; butter; dust with flour.

  2. Sift flour, baking powder, and salt together in a medium bowl. With electric mixer, beat butter on medium-high speed until light and fluffy, 4 minutes. Add sugar; beat well. Reduce speed to medium; add eggs one at a time, beating well after each. Reduce speed to low; alternately add flour and buttermilk, starting and ending with flour. Stir in zest.

  3. Pour batter into pan; bake, rotating halfway through, until tester inserted into center comes out clean, about 30 minutes. Cool in pan on rack 15 minutes. Remove; let cool completely right side up on rack.


Swiss Meringue Buttercream

Ingredients

  • 1 pound (4 sticks) unsalted butter, room temperature
  • 1 1/2 cups sugar
  • 6 egg whites
  • 1 teaspoon pure vanilla extract

Directions

  1. Beat butter with electric mixer until fluffy and pale. Transfer to small bowl.

  2. In double boiler over simmering water, whisk sugar and egg whites until warm and sugar is dissolved, 2 to 3 minutes. Transfer to clean bowl of electric mixer; beat on high with whisk attachment until fluffy and cooled, about 10 minutes.

  3. Reduce mixer to medium-low; add butter a scant 1/4 cup at a time, beating well after each addition. Mix in vanilla.

  4. Switch to paddle attachment; beat on lowest speed 3 to 5 minutes. Leave at room temperature if using same day. Or store airtight in refrigerator up to 3 days. Bring to room temperature; beat until smooth.


Directions

  1. Trim bottom layers; stack on cake round, with 3/4 cup buttercream spread over top of each. Add top layer; spread 1 cup buttercream over entire cake. Refrigerate 40 minutes until firm. Tint half remaining buttercream pink.

  2. Place cake on rotating stand. Lay flat a 12-inch pastry bag with #103 tip. Fill half of bag from tip to top with pink buttercream, other half with white. Hold bag vertically, slot of tip perpendicular to cake; use swift back-and-forth motion 1 inch wide to make ruffle, pulling tip up side.

  3. Turn cake stand slowly, piping circular ruffle over top.

Tuesday, May 24, 2011

Healthy Vegetables over Quinoa


We are starting to see signs of summer here in Chicago. The weather teases you though, one day it will be beautiful and it makes you think summer has finally arrived! Then the next day it's gloomy, windy, and rainy. O well, I'm hanging in there and can't wait till it's consistently nice!

One of the warm, summery days we had got me in the mood to make a light and fresh summery meal. I have been making a lot of quinoa lately and am constantly trying to find new ways to incorporate it into a meal. This recipe is great for using up left over veggies in your fridge. It's light, fresh, and delicious. I didn't stick to this recipe exactly because I didn't have all the veggies it called for. Instead of green onions I used red onions, and for the vegetables I used red and green peppers, zucchini, and corn. So it really is full proof and you can throw in whatever you want! A tip: make a bunch of quinoa the beginning of the week, keep it in a tupperware in your fridge and then you can pull it out for a quick meal like this:)


Quinoa with Veggies

Ingredients

* 1 cup quinoa
* 3 cups water
* 1 pinch salt
*
* 3 tablespoons olive oil
* 3 cloves garlic, minced
* 1 red bell pepper, chopped
* 1/2 cup corn kernels
* 1/2 teaspoon cumin
* 1 teaspoon dried oregano
* salt and pepper to taste
* 2 green onions, chopped

Directions

1. Bring the quinoa, water, and 1 pinch of salt to a boil in a saucepan. Reduce heat to medium-low, cover, and simmer until the quinoa is tender, about 20 minutes. Once done, drain a mesh strainer, and set aside.
2. Meanwhile, heat the olive oil in a saucepan over medium heat. Stir in the garlic, and cook until the garlic softens and the aroma mellows, about 2 minutes. Add the red pepper, and corn; continue cooking until the pepper softens, about 5 minutes. Season with cumin, oregano, salt, and pepper, and cook for 1 minute more, then stir in the cooked quinoa and green onions. Serve hot or cold.

Monday, May 16, 2011

New Favorite Chocolate Chip Cookie Recipe-Seriously


So I guess yesterday was National Chocolate Chip Day-without even knowing this I got the urge to make some chocolate chip cookies. It must have been some sort of inspiration:) I wanted to try a new recipe though. I've had some coconut oil for a while and haven't used much of it yet, so I searched for chocolate chip cookies made with coconut oil. I found a winner! Seriously, these cookies turned out so yummy I really think they will be my go to chocolate chip cookie from now on. Now, for those of you who know me you know how big of a deal that is because I swear by my cookie recipe and am very faithful to it. I like how easy these cookies are to make, and I also love that they are made with a good fat-coconut oil. I've always hated that the chocolate chip cookie recipe I use calls for shortening. I always try not to use any shortening in my baking. So now I think I have a win win-a cookie recipe that's just as good as my old recipe and is better for you!

The coconut oil I used was Nutiva extra virgin organic. It has a mild coconut flavor which I LOVED for these cookies. Some coconut oil has no flavor which is what I like to use for sauteing, but this coconut oil is great for baking if you like a little coconut flavor. If you want to learn about the health benefits of coconut oil go here. The texture of these cookies were soft, chewy, and gooey. The key I found is to take them out when they look pretty under done. They harden up pretty quickly. I got three batches of 6 larger cookies and the batch that turned out the best was the one where I baked it for 9 1/2 minutes. But everyone's oven is different so you may need to find out what works best for you:)
Chewy Chocolate Chip Cookies
from Cheeky Kitchen

1/2 cup coconut oil
2 eggs
1 1/2 cups brown sugar
1/2 teaspoon salt
1 teaspoon baking powder
1/4 teaspon baking soda
1 tablespoon vanilla
1 3/4 cup flour
8 ounces mini chocolate chips
8 ounces large chocolate chips

In a large bowl, use an electric mixer to beat together coconut oil, eggs, and brown sugar until very well mixed. Add remaining ingredients, mixing together until all are incorporated. Roll into massive balls (I made my cookies from 3 tablespoons of dough. That’s just how I roll.) and place 6 on a cookie sheet. Bake in an oven preheated to 400 degrees for 9-11 minutes, or just until the outside of the cookies have browned ever so slightly around the edges. Remove, cool slightly, devour.

Wednesday, May 4, 2011

Someones birthday is coming up:)

So tomorrow is Eleni's birthday. I can't believe it! I have been flooded with so many emotions this past week. I've been thinking a lot about this past year. First of all I can't believe it's already been a year. I've been thinking about the ups and downs. The countless hours Micah and I spent pacing the floors with Eleni during her colicky days, and then my mom and dad coming to the rescue when I was spent and taking a turn to hold Eleni. Finally at about 5 1/2 months Eleni getting over her colic, I was so happy for her that she wasn't in pain anymore and she became such a happy baby. I think about her little quircky ways, some things she doesn't do anymore and some things she still does. Like her crazy, twisting hands (those of you who know my baby know what I'm talking about;) ) These memories make me so emotional. I'm not sad that my baby isn't staying a baby. I'm actually really excited to see her grow and to see her at new stages. Maybe some of my sadness comes from not having family around to help me celebrate her birth. I wish so bad they were by me right now!

But on a more positive note:) I'm so excited for the little party I am planning for Eleni! Even though her birthday is tomorrow, the party will be Saturday. I can't wait to share with you the pictures from her little party. I can't wait to see what Eleni does when I give her her little cake. I wonder if she will go right at it or be a little tentative. I can see it going both ways:)

I can't believe she used to be this small!
O how I love my little Leni, leni pie, lenard, lens, lenners, lenekins. She has kept this year busy, not a dull moment. Micah and I both feel so blessed to have received such a sweet little spirit...well a sweet and spicy spirit:) I love our little family. I couldn't imagine doing anything else right now with my life other than being a mom. It's so rewarding. Greatest joy I have ever felt.

A personal blog is in the works, so I don't have to keep mixing personal life and cooking:) Sorry for those who come to this blog expecting a recipe and instead you get a long post about my baby girl:) It will happen-soon:)

Sunday, April 17, 2011

Painting, Family, and Best Ever Rice Krispie Treats


These past few weeks have been sooo busy! I will quickly sum up what I have been up to...painting. And lots of it. A week before our carpet was scheduled to be installed I decided I wanted to try and paint our upstairs before the carpet was put in. So within 6 days we painted 3 bedrooms, our upstairs hall and ceiling, our bedroom ceiling, the baseboard thingy's going up our stairs, and part of our banister. My life for those 6 days consisted of waking up before Eleni to get some painting in, take care of Eleni till her nap-paint during her nap, repeat for 2nd nap, then as soon as she went to bed I would paint till 11-12, then repeat the whole process the next day! It was such an exhausting week and I am so glad it's over! Our upstairs is painted and I am excited to start painting our main floor, but I will take my time and not rush this one:)

I really wanted to blog the past couple weeks but painting took it out of me and I didn't have one second to do anything else, and this past week my family came to visit. It was so much fun to have them here! It broke my heart to see them go, but I am starting to get back into the swing of things and I am realizing once again that things will be ok even though we live quite a ways apart.

So, I finally have a recipe for you! A few weeks ago I wanted to make rice krispies, but I started thinking how I could take them to another level. I thought, what if I browned the butter? So I googled to try to find a recipe that used browned butter, and I found one that called for browned butter and sea salt. I decided to try it out, but also add a few things of my own. I added 1/4 tsp. almond extract, 1 tsp vanilla, and I added white chocolate chips and drizzled the top with dark and white chocolate. Wooooaaah baby were they good! Kinda ridiculously good, best rice krispies ever! There's no way I can go back to plain old rice krispies ever again:) Make these for your next pot luck or friendly gathering and you will sure to impress.

Salted Brown Butter Crispy Treats

from smitten kitchen

Makes 16 2-inch squares or 32 1- x 2-inch small bars

4 ounces (1/4 pound or 1 stick) unsalted butter, plus extra for the pan
1 10-ounce bag marshmallows
Heaping 1/4 teaspoon coarse sea salt
6 cups Rice Krispies cereal (about half a 12-ounce box)


My additions:

1/4 tsp, almond extract
1 tsp vanilla
about half cup of white chocolate chips
white and dark chocolate for the top

Butter (or coat with non-stick spray) an 8-inch square cake pan with 2-inch sides.

In a large pot, melt butter over medium-low heat. It will melt, then foam, then turn clear golden and finally start to turn brown and smell nutty. Stir frequently, scraping up any bits from the bottom as you do. Don’t take your eyes off the pot as while you may be impatient for it to start browning, the period between the time the butter begins to take on color and the point where it burns is often less than a minute.

As soon as the butter takes on a nutty color, turn the heat off and stir in the marshmallows. The residual heat from the melted butter should be enough to melt them, but if it is not, turn it back on low until the marshmallows are smooth. Add white chocolate chips at this time if you want.

Remove the pot from the stove and stir in the salt and cereal together. Quickly spread into prepared pan.

Drizzle with white and dark chocolate:)