Friends and Fam
They make me Dream
They make me hungry
- 52 cupcakes
- annies eats
- bakerella
- baking blonde
- cafe johnsonia
- cannelle-vanille
- Chocolate shavings
- clumbsy cookie
- cookie baker lynn
- culinary concoctions by peadbody
- daisy lane cakes
- delightful delicacies
- dinner and dessert
- elly says opa
- fried pickles and icecream
- gigi cakes
- good things catered
- Greek food and beyond
- hot garlic
- how to eat a cupcake
- la cuisine d' helene
- lemonee snippets
- Lynns Kitchen Advenures
- mad baker
- noble pig
- our recipe club
- picky palate
- proud italian cook
- prudence penny wise
- scoopalicious
- Smitten Kitchen
- sticky gooey creamy chewy
- sweets by sarah
- tartelette
- the muffin top
- the recipe girl
Monday, October 18, 2010
National Chocolate Cupcake Day!!!!
Did you know that today is national chocolate cupcake day?! So run out and grab a chocolate cupcake to celebrate! :) I think I am going to run over to the new cupcake chic and get one. Have a wonderful day!! :) :)
Thursday, October 14, 2010
Bakerella :)
Wednesday, October 13, 2010
Pumpkin Dessert Squares
So this is not a new recipe to this blog, but one that needed to definitely be updated with better pictures. The pictures I used to have for it just didn't make this dessert look as amazing as it really was. Seriously-this could be my favorite pumpkin dessert I make during the fall. I was at my local Williams Sonoma store the other day and they were passing out samples of it which reminded me that it was time to start making it again! I've been trying to eat pretty healthy, and I've been surprisingly been doing a good job! ...that is until I made these bad boys. With this dessert I can't just stop at one square, I will keep piecing and piecing at it until all of a sudden a whole row is gone!! O00pps :)
The only downfall to this recipe is you have to use Williams Sonoma's Pumpkin Pecan Butter, which is almost $10 a jar. However this dessert is so good I think it's worth getting. I want to try to make this dessert with a substitute so it's not as expensive to make. Making I could substitute it with some canned pumpkin mixed with spices?? Who knows, but I will definitely give it a shot so I won't alwasy have to rely on using the Pumpkin Pecan Butter, but for now that's what I'll use:) Hope you have a chance to try this one out :)
Pumpkin Dessert Squares
Tuesday, October 5, 2010
Lentil Sausage Soup
Fall is now upon us, and I am so excited to start making yummy soups and stews. Here is the first soup I've made this fall season. I wanted to make something healthy, and yet something different-something I haven't made before. I stumbled a crossed Ina Garten's Lentil Sausage Soup. Yes I know- another Ina Garten recipe, but I am never disappointed with her recipes and I didn't want to risk trying something new and having it turn out bad. I just knew this soup would be amazing-and it was. It's really filling and extremely flavorful. I did change a couple things, I left out the sausage and red wine vinegar. I didn't have the vinegar and even if I did I'm not sure if I would have added it, it was still delicious without it. I know I will be making this soup a few more times this fall and winter. Next on my to do cooking/baking list is to make something pumpkiny-mmmmm can't wait:)
Lentil Sausage Soup
by Ina Garten
Ingredients
nocoupons
- 1 pound French green lentils (recommended: du Puy)
- 1/4 cup olive oil, plus extra for serving
- 4 cups diced yellow onions (3 large)
- 4 cups chopped leeks, white and light green parts only (2 leeks)
- 1 tablespoon minced garlic (2 large cloves)
- 1 tablespoon kosher salt black pepper
- 1 tablespoon minced fresh thyme leaves
- 1 teaspoon ground cumin
- 3 cups medium diced celery (8 stalks)
- 3 cups medium diced carrots (4 to 6 carrots)
- 3 quarts Homemade Chicken Stock or canned broth
- 1/4 cup tomato paste
- 1 pound kielbasa, cut in 1/2 lengthwise and sliced 1/3-inch thick
- 2 tablespoons dry red wine or red wine vinegar
- Freshly grated Parmesan, for serving
Directions
In a large bowl, cover the lentils with boiling water and allow to sit for 15 minutes. Drain.
In a large stockpot over medium heat, heat the olive oil and saute the onions, leeks, garlic, salt, pepper, thyme, and cumin for 20 minutes, or until the vegetables are translucent and tender. Add the celery and carrots and saute for another 10 minutes. Add the chicken stock, tomato paste, and drained lentils, cover, and bring to a boil. Reduce the heat and simmer uncovered for 1 hour, or until the lentils are cooked through and tender. Check the seasonings. Add the kielbasa and red wine and simmer until the kielbasa is hot. Serve drizzled with olive oil and sprinkled with grated Parmesan
Sunday, October 3, 2010
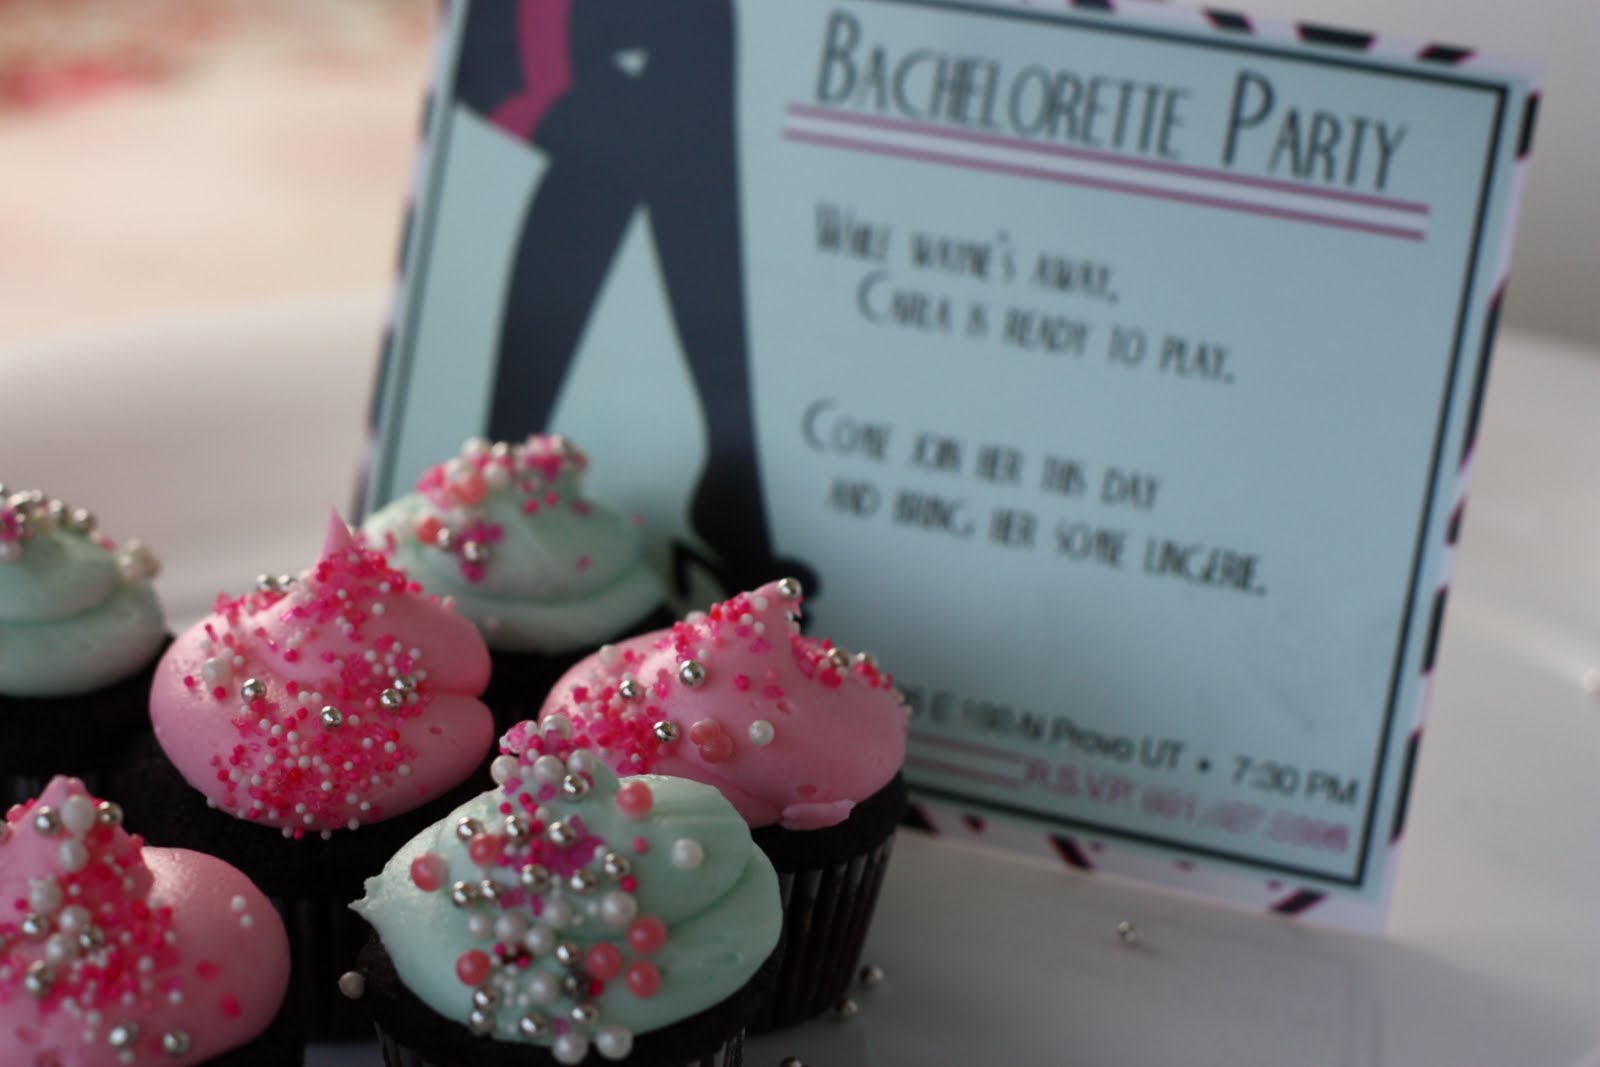
Bachelorette Cupcakes
My sister in law asked me to make some cupcakes for her friend’s bachelorette party. She wanted me to match the colors of the party, which were a turquoise blue and pink. Of course I was so excited to do it, I love any excuse to bake.
I used my all time favorite chocolate cupcake recipe- well my all time favorite for now, I have yet to come across a recipe I like better. The cupcakes always come out just right, very moist and a slightly denser cupcake than most. I used my extra brutte cocoa powder this time in the cupcakes and it made these cupcakes even better. I frosted them with a cream cheese frosting. I never really follow a frosting recipe, but the general rule I follow for a cream cheese frosting is equal amounts of cream cheese and butter, creamed together, then I add just enough powdered sugar so that it taste good but isn’t too sweet. For this frosting I used a half pound of cream cheese and a half pound of butter, and I probably added about 5-6 cups of powdered sugar, I didn’t really count but that is my estimate. I always add good vanilla, like a Madagascar vanilla, it makes a big difference. O-and a pinch of salt,makes a big difference I think.
Since my last 3 posts have been sweet things, how about something savory?? How does a lentil sausage soup sound?? Check back tomorrow for the recipe :)
Wednesday, September 29, 2010
Devil's Food Cake with Chocolate Mousse Buttercreammm...
So are you ready for the best devils food chocolate cake recipe ever?? The most delicious, moist cake piled high with the most unbelievable chocolate mouse buttercream??? You are! Are you sure???...K here it is!!!
My bday was a week ago, and on Sunday I made myself a chocolate cake to celebrate my birthday with my fam (yes, I like to make my own birthday cakes :) ). I've had the wonderful book "Sticky, Chewy, Messy, Gooey" for a while, and I love it! Not only is it so much fun to flip through and look at the delicious pictures, but the recipes I have tried so far taste just as good as they look in the book. I highly recommend this book, it's a winner :)
A reason why this cake is so good is because of the chocolate mousse buttercream. It's so creamy and chocolaty and not overly sweet. But if you decide to make this, do me a favor. When it comes to adding the butter to the mouse, just close your eyes and put it in! Yes, all 1 1/2 pounds of it!!! I mean, it is a cake, no need to try skimping on calories. It will seem like an incredible amount of butter, but trust me, it's worth putting it all in, this buttercream is o- so good:)
I found the recipe online, and you can find it here!
Monday, September 27, 2010
Daring Bakers: Decorated Sugar Cookies
To the basic sugar cookie recipe I added a teaspoon of almond extract, they turned out super yummy! And I doubt you will ever find an easier sugar cookie recipe, I mean 5 ingredients?! In the words of Ina Garten "How bad can that be?!" I also used royal icing for the piping on my cookies, and then this icing recipe for the flooding. You can use the royal icing for flooding as well, I just wanted to try both of them out. Next time I will probably do either or because it made extra work on my part making both types of icing. The royal icing gives the cookies a more matte look than this icing, which leaves the cookies looking glossy and perfect.
I hope some of you get a chance to try this out, it was really fun, however my kitchen does look like a bomb went off with royal icing and piping bags everywhere!..not looking forward to cleaning that up :) I will definitely be trying this again.
And please check back tomorrow for an outa this world chocolate cake recipe!!!
leavening agent, the cookies will come out exactly like
the cookie cutter you use.
Basic Sugar Cookies:
Makes Approximately 36x 10cm / 4" Cookies
200g / 7oz / ½ cup + 6 Tbsp Unsalted Butter, at room temperature
400g / 14oz / 3 cups + 3 Tbsp All Purpose / Plain Flour
200g / 7oz / 1 cup Caster Sugar / Superfine Sugar
1 Large Egg, lightly beaten
5ml / 1 tsp Vanilla Extract / Or seeds from 1 vanilla bean
Directions
• Cream together the butter, sugar and any flavourings you’re using. Beat until just becoming
creamy in texture.
• Tip: Don’t over mix otherwise you’ll incorporate too much air and the cookies will spread during
baking, losing their shape.
• Beat in the egg until well combined, make sure to scrape down the sides of the bowl.
Add the sifted flour and mix on low until a non sticky dough forms.
• Tip: I don’t have a stand mixer so I find it easier to switch to dough hooks at this stage to avoid
flour flying everywhere.
• Knead into a ball and divide into 2 or 3 pieces.
• Roll out each portion between parchment paper to a thickness of about 5mm/1/5 inch (0.2 inch)
• Refrigerate for a minimum of 30mins.
• Tip: Recipes commonly just wrap the whole ball of dough in clingwrap and then refrigerate it for an
hour or overnight, but by rolling the dough between parchment, this shortens the chilling time and
then it’s also been rolled out while still soft making it easier and quicker.
• Once chilled, peel off parchment and place dough on a lightly floured surface.
• Cut out shapes with cookie cutters or a sharp knife.
• Arrange shapes on parchment lined baking sheets and refrigerate for another 30mins to an hour.
• Tip: It’s very important you chill them again otherwise they’ll spread while baking.
• Re-roll scraps and follow the above process until all scraps are used up.
• Preheat oven to 180°C (160°C Fan Assisted) / 350°F / Gas Mark 4.
• Bake until golden around the edges, about 8-15mins depending on the size of the cookies.
• Tip: Bake same sized cookies together otherwise mixing smaller with larger cookies could result in
some cookies being baked before others are done.
• Tip: Rotate baking sheets half way through baking if your oven bakes unevenly.
• Leave to cool on cooling racks.
• Once completely cooled, decorate as desired.
• Tip: If wrapped in tinfoil/cling wrap or kept in airtight containers in a cool place, un-decorated
cookies can last up to a month.
Royal Icing:
315g – 375g / 11oz – 13oz / 2½ - 3 cups Icing / Confectioner’s / Powdered Sugar, unsifted
2 Large Egg Whites
10ml / 2 tsp Lemon Juice
5ml / 1 tsp Almond Extract, optional
Directions
• Beat egg whites with lemon juice until combined.
• Tip: It’s important that the bowls/spoons/spatulas and beaters you use are thoroughly cleaned and
grease free.
• Sift the icing sugar to remove lumps and add it to the egg whites.
• Tip: I’ve listed 2 amounts of icing sugar, the lesser amount is good for a flooding consistency, and the larger amount is for outlining, but you can add even more for a much thicker consistency good for writing. If you add too much icing sugar or would like to make a thinner consistency, add very small amounts of water, a few drops at a time, until you reach the consistency you need.
• Beat on low until combined and smooth.
• Use immediately or keep in an airtight container.
• Tip: Royal Icing starts to harden as soon as it’s in contact with air so make sure to cover containers with plastic wrap while not in use.
Decorating Your Cookies: Flooding
“Flooding” a cookie is a technique used when covering a cookie with Royal Icing.
1. You outline the area you want to flood which helps create a dam
2. Then fill or flood inside the area you’ve outlined
Decorating Your Cookies: Royal Icing
The most important thing when it comes to decorating with Royal Icing is the consistency.
There are two ways of flooding your cookies. Some like to do the outline with a thicker icing and then flood with a thinner icing. Some like to use the same icing to do both which saves time and you don’t have to have two different piping bags for each colour you’re using.
The Same Consistency Method
Consistency:
• Mix your royal icing according to the recipe/instructions
• Drag a knife through the surface of the Royal Icing and count to 10
• If the surface becomes smooth between 5 & 10 seconds, the icing is at the correct consistency
• Tip: If your icing is too thick, thin it by adding a few drops of water. Mix, do the 10 second test, then if it’s still too thick, add a few more drops of water, repeat, etc.
• Tip: To thicken your icing, add small amounts of icing sugar until thick enough for the 10 second test
Two Different Consistencies Method
Consistency:
• Mix your royal icing according to the recipe/instructions.
• Separate into 2 different bowls, one lot of icing for outlining, the other for flooding.
• For the outlining icing, drag a knife through the surface of the Royal Icing.
• If the surface becomes smooth at around 10 seconds, the icing is at the correct consistency.
• Tip: If your icing is too thick, thin it by adding a few drops of water. Mix, count to 10 seconds, then if it’s still too thick, add a few more drops of water, repeat, etc.
• Tip: To thicken your icing, add small amounts of icing sugar until thick enough for the 10 second test.
• For the flooding/filling icing, drag a knife through the surface of the Royal Icing.
• If the surface becomes smooth at around 3-4 seconds, the icing is at the correct consistency.
• Tip: If your icing is too thick, thin it by adding a few drops of water. Mix, count to 3-4 seconds, then if it’s still too thick, add a few more drops of water, repeat, etc.
• Tip: To thicken your icing, add small amounts of icing sugar until thick enough for the 3-4 second test.
Tuesday, August 24, 2010
Listen up people!! I've got a seriously good cookie recipe for ya!
Ok-so I may have already posted this recipe before...but I made them again and this time they are extra good! I mean Extra EXTRA good! They are Kathleen Kings Double Chocolate Almond Cookies (again i left out the almonds-not a huge fan of nuts in my cookies-sometimes they are ok). Wanna know why they were EXTRA good this time?? K I'll tell ya!
For the cocoa powder I used my new dutch process cocoa, Extra Brutte Cocoa Powder. This stuff is awesome. Such a deep, chocolately flavor. It took these cookies to another level. Can't wait to make them again!
I've also decided I'm going to move away from cupcakes for a while and start making cookies. It was so nice yesterday when I made them to not have to worry about making an icing for them, not have to worry about decorating them...and quit frankly I would rather have one of these cookies than a cupcake. Gasp! I know! Crazy right?
Well tomorrow we are going on our first family vacation with out little one! Guess where we're going...I'll give you a hint...
our first stop will be to visit Lou Malnati's Pizzeria...
then the next day we are going to take a little drive to what I considered my home-where I grew up to get a delicious butter burger from Solly's Grille. This place is the birth place of the butter burger and I haven't had one in almost ten years so it's about time I go back and get me another!
If you haven't guessed, figured it out, or if you haven't gone to my lovely links :) ...You'll just have to wait till I post some pics tomorrow:)
I've posted the recipe for Kathleen cookies on my blog before, so you can look for it under "cookies" or you can go here for the recipe:)
Sunday, August 22, 2010
Unbelievable, Amazing, Whopper Cupcakes
This one is for all of those who love malted milk balls and who love malt in general. I mean, who wouldn't like malt?! It's simply the best! And when you put that delicious malted flavor into a cupcake..well your just pushing all the right buttons. I've made these cupcakes twice now, both times I have gotten rave reviews, especially about the frosting. It's quit possibly one of my favorite frostings ever. I got this recipe from the wonderful blog our recipe club.
The only thing I do differently with the recipe is the way I mix the ingredients together. I don't know why but the way this recipe says how to incorporate the ingredients together makes me nervous, even though I'm sure they would turn out just fine! But I am kinda weird in that when I make a cake I always add the dry ingredients into the butter/egg mixture alternating with the wet. So what I do is blend the oil, eggs, and vanilla together and I add the sour cream into the milk/malt mixture. After the eggs are blended into the oil mixture I add the dry and wet ingredients, begining and ending with the dry (I do 1/3 of the dry at a time, so you will do 3 additions of dry ingredients). So you can make these cupcakes with my mixing instructions if you are super anal like me, or just use the directions listed bellow in the recipe, because they will probably turn out just as good. Enjoy!
2 1/4 cup flour
1 1/4 cup sugar
3/4 cup unsweetened cocoa
1 1/2 tsp. baking soda
1 tsp. baking powder
1/2 tsp. salt
1 cup milk
1 cup malted milk powder
1 cup vegetable oil
3 large eggs
1 cup sour cream
1 tsp. vanilla
Preheat oven to 350 degrees. Line muffin tins with cupcake liners.
In a large mixing bowl, combine flour, sugar, cocoa, baking soda, baking powder and salt.
In a small bowl, combine milk and malted milk powder, stirring to dissolve. Add milk mixture, oil and eggs to flour mixture, beating at medium speed with an electric mixer until smooth. Add sour cream and vanilla, beating just until combined.
Pour batter evenly into prepared pans and bake for 15-17 minutes. Let cool in pans for 10 minutes. Remove from pans and let cool completely on racks.
Frost and garnish w/malted milk balls if desired
Malt Frosting
1 cup butter, softened
3/4 cup heavy whipping cream
1/2 cup malted milk powder
6-7 cup powdered sugar
Blue food coloring
In a large bowl, beat butter at medium speed with an electric mixer until creamy.
In a small bowl, combine cream and malted milk powder, stirring to dissolve. Add cream mixture to butter mixture, beating at low speed to combine. Gradually beat in powdered sugar until smooth. You may need to add more or less powdered sugar depending on desired consistency. Add 6 to 8 drops of food coloring, mix well. Add more if you would like a deeper color. Frost cupcakes, top with a Whopper-malted milk ball & enjoy!
Friday, August 6, 2010
Outa this world Peanut Butter Caramel Swirled Brownies
Ok, so since it's been a while-AGAIN- I decided to treat you guys to a yummy recipe:) A SUPER yummy recipe! For a while now I have been wanting to try Bobby Flay's peanut butter caramel swirl brownies he made for a throw down against Vermont's brownie company. The Vermont Brownie Company won with their dark chocolate chevre brownies (how good does that sound?!) However, after finally trying Bobby's recipe I am wondering if there should be a re match cause this recipe is a winner!
I have never been a fan of dark chocoate, but over the past year I have started to like it more and more. These brownies definitely have a rich, dark chocolately flavor. However, instead of using bittersweet chocolate I did use semisweet. I just thought the bittersweet would have been too dark for me. The peanut butter caramel is outa this world. My only complaint with this recipe is I wish there was more of the caramel. Next time I make them I am going to double the caramel and use about 3/4 of it for the brownies. I also would suggest not over doing it on the swirling-it's best when you have bigger globs of the caramel:)
One last note-the recipe says to bake the brownies at 325, but I did read one reviews of the recipe and they said you should bump the heat up to 350. Well I just baked them according to the recipe at 325, and after 22 minutes they were no where near to being done, so I kept them in the oven bumpepd it up to 350 and they were perfect in about 6 minutes. So maybe try baking them at 350, but don't over bake! They are supposed to be a very fudgey brownie! Enjoy!
o-and one other thing, I sprinkled a little bit of fleur de sel over the top of the brownies-to die for!!
Peanut Butter Caramel Swirled Brownies
Ingredients
- 1/2 cup heavy cream
- 1/4 cup sugar
- 1/4 cup water
- 1/2 cup smooth peanut butter
- 1 tablespoon corn syrup
- Pinch sea salt
- 1/8 teaspoon vanilla extract
- 1 cup (2 sticks) unsalted butter, cut into chunks
- 6 ounces high-quality unsweetened chocolate, coarsely chopped
- 2 ounces bittersweet chocolate, coarsely chopped, plus 4 ounces
- 1 teaspoon espresso powder
- 4 large eggs
- 1 1/2 cups granulated sugar
- 1/2 cup packed light brown muscavado sugar
- 2 teaspoons pure vanilla extract
- 1/4 teaspoon fine salt
- 1 cup unbleached all-purpose flour
Directions
Bring the cream to a simmer over low heat in a small saucepan. Combine the sugar and water in a small saucepan over high heat and cook, without stirring until amber brown. Slowly whisk in the warm cream until smooth and let cook for 1 minute. Remove from the heat and whisk in the peanut butter, corn syrup, sea salt and 1/8 teaspoon of vanilla extract until smooth. Transfer to a bowl and let cool until thickened at room temperature, about 30 minutes.
Put a rack in the middle of the oven and preheat the oven to 325 degrees F. Line a 9 by 13-inch baking pan with foil, leaving an overhang on the narrow ends. Spray the foil and pan with nonstick spray.
Combine the butter, unsweetened chocolate, 2 ounces bittersweet chocolate and espresso powder in a medium bowl set over a pot of simmering water. Let the chocolate melt over low heat, stirring frequently until smooth. Remove from the heat and let cool slightly, about 5 minutes.
In a large bowl, whisk the eggs, both sugars, vanilla and salt until smooth. Whisk in the melted chocolate mixture until combined. Scrape down the sides of the bowl. Beat in the flour in 2 additions (the batter will be thick). Stir in the remaining 4 ounces of chopped bittersweet chocolate.
Scrape half of the batter into the prepared pan and smooth the top. Using a tablespoon, drop dollops of half of the peanut butter caramel every 2 inches over the top of the batter. Carefully add the remaining batter and smooth over the caramel. Smooth the top and dollop the remaining caramel over the top. Use a butter knife to swirl through the batter to get a marbleized effect.
Bake until the top is set but still soft and the edges are puffed and just beginning to pull away from the sides of the pan, about 23 to 25 minutes. A toothpick inserted in the center will come out still gooey (be brave!--underbaking the brownies is one of the secrets to their fudgy texture). Transfer the pan to a wire rack to cool completely.
For the neatest cuts, refrigerate the pan for about 20 minutes before cutting the brownies. Using the foil, lift the brownie slab out of the pan. Carefully peel off the foil and put the brownie on a large cutting board. With a large sharp knife, cut the brownies into 48 squares. (The brownies can be stored in an airtight container, at room temperature, for up to 3 days; they can also be frozen, well wrapped, for up to 2 weeks.)